[{"id":1,"idCode":"darkViteSimple","title":"Simple React Site","description":"This is a simple one-page React site created with Vite that has Typescript and Sass already installed.","featureMarkdown":"- built with **Vite**\n- **one-page** without any menu\n- dark layout\n- TypeScript\n- one **Sass** file (`index.css` is deleted)\n- *good for simple sites and basic React howto examples*","githubUrl":"https://github.com/edwardtanguay/blank-vite-dark","githubUrl2":"","installMarkdown":"## install\n\n- download zip\n- copy all files to new directory, e.g. `/home/yourname/projects/site001`\n- open VSCode in that directory (`code .`)\n- `npm i`\n- `npm run dev`","demoUrl":"","updowngradeList":"add React Router menu|darkViteSimpleMenu","learningMaterialList":"","todoList":"","externalForkList":"","hasAnimation":false,"imageUrl":"http://starters-backend.tanguay.eu/images/starters/darkViteSimple.png","isFullStack":false,"readmeText":"# Simple React Site\n\nThis is a simple one-page React site created with Vite that has Typescript and Sass already installed.\n\n\n\n## features\n\n- built with **Vite**\n- **one-page** without any menu\n- dark layout\n- TypeScript\n- one **Sass** file (`index.css` is deleted)\n- *good for simple sites and basic React howto examples*\n\n## install\n\n- download zip\n- copy all files to new directory, e.g. `/home/yourname/projects/site001`\n- open VSCode in that directory (`code .`)\n- `npm i`\n- `npm run dev`\n\n## more starters, templates and frameworks\n\nhttps://starters.tanguay.eu","updowngradeItems":[{"text":"add React Router menu","idCode":"darkViteSimpleMenu"}],"learningMaterialItems":[],"todoItems":[],"externalForkItems":[]},{"id":2,"idCode":"darkViteSimpleMenu","title":"React Site with Menu","description":"This is a simple one-page React site created with Vite that has Typescript and Sass installed, and with React Router and a CLI that enables you to easily create pages.","featureMarkdown":"- built with **Vite**\n- **React Router** menu\n- dark layout\n- TypeScript\n- one **Sass** file (`index.css` is deleted)\n- **CLI** to easily create pages (`npm run cp Info` creates info page)\n- *good for simple React sites that require a menu*","githubUrl":"https://github.com/edwardtanguay/blank-vite-dark-menu","githubUrl2":"","installMarkdown":"## install\n\n- download zip\n- copy all files to new directory, e.g. `/home/yourname/projects/site001`\n- open VSCode in that directory (`code .`)\n- `npm i`\n- `npm run dev`","demoUrl":"","updowngradeList":"remove React Router menu|darkViteSimple;add useContext|blankViteDarkMenuUsecontext;add Zustand|blankViteDarkMenuZustand","learningMaterialList":"","todoList":"put Sass class names on each page;add 404 fixes for Vercel and Netlify (see useContext starter)","externalForkList":"","hasAnimation":false,"imageUrl":"http://starters-backend.tanguay.eu/images/starters/darkViteSimpleMenu.png","isFullStack":false,"readmeText":"# React Site with Menu\n\nThis is a simple one-page React site created with Vite that has Typescript and Sass installed, and with React Router and a CLI that enables you to easily create pages.\n\n\n\n## features\n\n- built with **Vite**\n- **React Router** menu\n- dark layout\n- TypeScript\n- one **Sass** file (`index.css` is deleted)\n- **CLI** to easily create pages (`npm run cp Info` creates info page)\n- *good for simple React sites that require a menu*\n\n## install\n\n- download zip\n- copy all files to new directory, e.g. `/home/yourname/projects/site001`\n- open VSCode in that directory (`code .`)\n- `npm i`\n- `npm run dev`\n\n## more starters, templates and frameworks\n\nhttps://starters.tanguay.eu","updowngradeItems":[{"text":"remove React Router menu","idCode":"darkViteSimple"},{"text":"add useContext","idCode":"blankViteDarkMenuUsecontext"},{"text":"add Zustand","idCode":"blankViteDarkMenuZustand"}],"learningMaterialItems":[],"todoItems":["put Sass class names on each page","add 404 fixes for Vercel and Netlify (see useContext starter)"],"externalForkItems":[]},{"id":3,"idCode":"blankViteDarkMenuUsecontext","title":"React Site with Menu and useContext","description":"This is a simple React site created with Vite that has Typescript and Sass installed, and with React Router and a CLI that enables you to easily create pages. It also has useContext implemented with an example of loading both static and API data in useContext and using these state variables on two separate pages.","featureMarkdown":"- built with **Vite**\n- **React Router** menu\n- dark layout\n- TypeScript\n- one **Sass** file (`index.css` is deleted)\n- **CLI** to easily create pages (`npm run cp Info` creates info page)\n- this site has **React Router 404 bug fixes** implemented for both Netlify (`public/_redirects` file) and Vercel (`vercel.json` file)\n- *good for any React project since state management such as useContext is useful in any site beyond the simplest demo sites*","githubUrl":"https://github.com/edwardtanguay/blank-vite-dark-menu-usecontext","githubUrl2":"","installMarkdown":"## install\n\n- go to your projects directory\n - e.g. `cd ~/projects`\n- in your projects directory, create your new site e.g. **site001** by cloning this project \n - `git clone git@github.com:edwardtanguay/blank-vite-dark-menu-usecontext.git site001`\n- open your newly created site in VSCode\n - `code site001`\n- inside VSCode, open the VSCode terminal\n - **CTRL-`**\n- delete the connection to this repository by deleting the Git repository\n - `rm -rf .git`\n- create a new local Git repository\n - `git init -b main`\n- install node_modules\n - `npm i`\n- start your site and click given link to view website\n - `npm run dev`","demoUrl":"https://blank-vite-dark-menu-usecontext.vercel.app","updowngradeList":"remove useContext|darkViteSimpleMenu;swap useContext for Zustand|blankViteDarkMenuZustand;replace React with Next.js|nextJsMenuTypeScriptUsecontextTailwind","learningMaterialList":"HOWTO: Implement useContext in an app with multiple pages and data sources|https://edwardtanguay.vercel.app/howtos?id=636","todoList":"","externalForkList":"add ability to upload files to a backend and display (upload004-backend)|https://github.com/edwardtanguay/upload004-backend;add ability to upload files to a backend and display (upload004-frontend)|https://github.com/edwardtanguay/upload004-frontend","hasAnimation":true,"imageUrl":"http://starters-backend.tanguay.eu/images/starters/blankViteDarkMenuUsecontext.png","isFullStack":false,"readmeText":"# React Site with Menu and useContext\n\nThis is a simple React site created with Vite that has Typescript and Sass installed, and with React Router and a CLI that enables you to easily create pages. It also has useContext implemented with an example of loading both static and API data in useContext and using these state variables on two separate pages.\n\n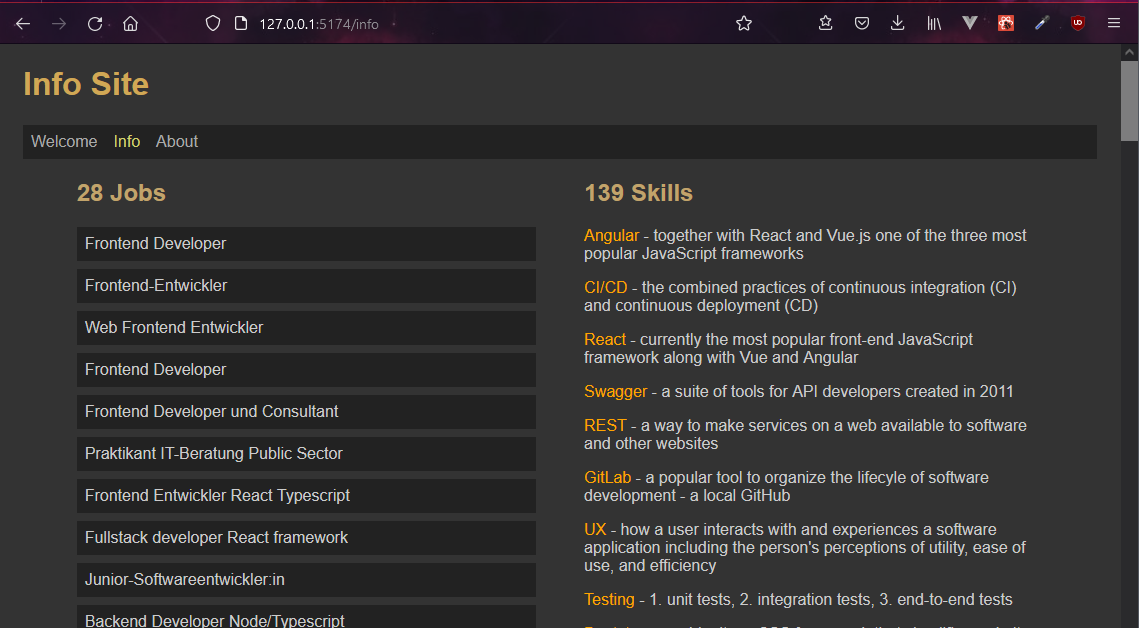\n\n## features\n\n- built with **Vite**\n- **React Router** menu\n- dark layout\n- TypeScript\n- one **Sass** file (`index.css` is deleted)\n- **CLI** to easily create pages (`npm run cp Info` creates info page)\n- this site has **React Router 404 bug fixes** implemented for both Netlify (`public/_redirects` file) and Vercel (`vercel.json` file)\n- *good for any React project since state management such as useContext is useful in any site beyond the simplest demo sites*\n\n## install\n\n- go to your projects directory\n - e.g. `cd ~/projects`\n- in your projects directory, create your new site e.g. **site001** by cloning this project \n - `git clone git@github.com:edwardtanguay/blank-vite-dark-menu-usecontext.git site001`\n- open your newly created site in VSCode\n - `code site001`\n- inside VSCode, open the VSCode terminal\n - **CTRL-`**\n- delete the connection to this repository by deleting the Git repository\n - `rm -rf .git`\n- create a new local Git repository\n - `git init -b main`\n- install node_modules\n - `npm i`\n- start your site and click given link to view website\n - `npm run dev`\n\n## more starters, templates and frameworks\n\nhttps://starters.tanguay.eu","updowngradeItems":[{"text":"remove useContext","idCode":"darkViteSimpleMenu"},{"text":"swap useContext for Zustand","idCode":"blankViteDarkMenuZustand"},{"text":"replace React with Next.js","idCode":"nextJsMenuTypeScriptUsecontextTailwind"}],"learningMaterialItems":[{"title":"HOWTO: Implement useContext in an app with multiple pages and data sources","url":"https://edwardtanguay.vercel.app/howtos?id=636"}],"todoItems":[],"externalForkItems":[{"title":"add ability to upload files to a backend and display (upload004-backend)","url":"https://github.com/edwardtanguay/upload004-backend"},{"title":"add ability to upload files to a backend and display (upload004-frontend)","url":"https://github.com/edwardtanguay/upload004-frontend"}]},{"id":4,"idCode":"blankViteDarkMenuZustand","title":"React Site with Menu and Zustand","description":"This is a simple React site created with Vite that has Typescript and Sass installed, and with React Router and a CLI that enables you to easily create pages. It also has Zustand as centralized state management implemented with an example of loading both static and API data the Zustand state variables on two separate pages.","featureMarkdown":"- built with **Vite**\n- **React Router** menu\n- dark layout\n- TypeScript\n- one **Sass** file (`index.css` is deleted)\n- **CLI** to easily create pages (`npm run cp Info` creates info page)\n- this site has **React Router 404 bug fixes** implemented for both Netlify (`public/_redirects` file) and Vercel (`vercel.json` file)\n- *good for any React project since state management such as Zustand is useful in any site beyond the simplest demo sites*","githubUrl":"https://github.com/edwardtanguay/blank-vite-dark-menu-zustand","githubUrl2":"","installMarkdown":"## install\n\n- go to your projects directory\n - e.g. `cd ~/projects`\n- in your projects directory, create your new site e.g. **site001** by cloning this project \n - `git clone git@github.com:edwardtanguay/blank-vite-dark-menu-usecontext.git site001`\n- open your newly created site in VSCode\n - `code site001`\n- inside VSCode, open the VSCode terminal\n - **CTRL-`**\n- delete the connection to this repository by deleting the Git repository\n - `rm -rf .git`\n- create a new local Git repository\n - `git init -b main`\n- install node_modules\n - `npm i`\n- start your site and click given link to view website\n - `npm run dev`","demoUrl":"https://blank-vite-dark-menu-zustand.vercel.app","updowngradeList":"remove Zustand|darkViteSimpleMenu;swap Zustand for useContext|blankViteDarkMenuUsecontext","learningMaterialList":"HOWTO: Create React site that uses Zustand as a state manager|https://edwardtanguay.vercel.app/howtos?id=601","todoList":"","externalForkList":"","hasAnimation":false,"imageUrl":"http://starters-backend.tanguay.eu/images/starters/blankViteDarkMenuZustand.png","isFullStack":false,"readmeText":"# React Site with Menu and Zustand\n\nThis is a simple React site created with Vite that has Typescript and Sass installed, and with React Router and a CLI that enables you to easily create pages. It also has Zustand as centralized state management implemented with an example of loading both static and API data the Zustand state variables on two separate pages.\n\n\n\n## features\n\n- built with **Vite**\n- **React Router** menu\n- dark layout\n- TypeScript\n- one **Sass** file (`index.css` is deleted)\n- **CLI** to easily create pages (`npm run cp Info` creates info page)\n- this site has **React Router 404 bug fixes** implemented for both Netlify (`public/_redirects` file) and Vercel (`vercel.json` file)\n- *good for any React project since state management such as Zustand is useful in any site beyond the simplest demo sites*\n\n## install\n\n- go to your projects directory\n - e.g. `cd ~/projects`\n- in your projects directory, create your new site e.g. **site001** by cloning this project \n - `git clone git@github.com:edwardtanguay/blank-vite-dark-menu-usecontext.git site001`\n- open your newly created site in VSCode\n - `code site001`\n- inside VSCode, open the VSCode terminal\n - **CTRL-`**\n- delete the connection to this repository by deleting the Git repository\n - `rm -rf .git`\n- create a new local Git repository\n - `git init -b main`\n- install node_modules\n - `npm i`\n- start your site and click given link to view website\n - `npm run dev`\n\n## more starters, templates and frameworks\n\nhttps://starters.tanguay.eu","updowngradeItems":[{"text":"remove Zustand","idCode":"darkViteSimpleMenu"},{"text":"swap Zustand for useContext","idCode":"blankViteDarkMenuUsecontext"}],"learningMaterialItems":[{"title":"HOWTO: Create React site that uses Zustand as a state manager","url":"https://edwardtanguay.vercel.app/howtos?id=601"}],"todoItems":[],"externalForkItems":[]},{"id":5,"idCode":"backendSimpleReadonlyJsonApi","title":"Node/Express API with simple JSON-file data source","description":"If you need to set up a quick Node/Express API, this is a good project to begin with. It has a simple MVC structure with the server.ts file kept simple with the Express routes which call the corresponding functions in the model.ts file. There is one simple example of middleware, a logger which writes to a text file each time the API is accessed. The JSON file has more data than is needed so there is a light example of data cleansing from \"raw books\" to \"book\", see the IRawBook and IBook interfaces. As all my starter examples, this API uses TypeScript and ES6 modules exclusively. To add a new data source, simply change `model.ts` by swapping out the JSON-file code with code for your data source, e.g. a MongoDB or MySQL database, etc.","featureMarkdown":"- Node/Express API\n- TypeScript\n - two interfaces: `IRawBooks`, `IBooks`\n- ES6 modules\n- three simple routes:\n - `/` - API instructions\n - `/books` - all books\n - `/books/3` - book with id 3\n- simple MVC structure\n - `server.ts` - responsible for req/res routes\n - `model.ts` - responsible for data functions\n- simple example of custom middleware (logger)\n- `config.ts` has centralized data \n- `test.rest` used for manual testing (need [REST Client VSCode extension](https://marketplace.visualstudio.com/items?itemName=humao.rest-client))\n- cors implemented","githubUrl":"https://github.com/edwardtanguay/backend-simple-readonly-json-api","githubUrl2":"","installMarkdown":"## install\n\n- go to your projects directory\n - e.g. `cd ~/projects`\n- in your projects directory, create your new site e.g. **backend001** by cloning this project \n - `git clone git@github.com:edwardtanguay/backend-simple-readonly-json-api.git backend001`\n- open your newly created site in VSCode\n - `code backend001`\n- inside VSCode, open the VSCode terminal\n - **CTRL-`**\n- delete the connection to this repository by deleting the Git repository\n - `rm -rf .git`\n- create a new local Git repository\n - `git init -b main`\n- install node_modules\n - `npm i`\n- start your site and click given link to view website\n - `npm run dev`","demoUrl":"","updowngradeList":"replace JSON data source with SQLite|sqliteReadonly","learningMaterialList":"","todoList":"","externalForkList":"","hasAnimation":false,"imageUrl":"http://starters-backend.tanguay.eu/images/starters/backendSimpleReadonlyJsonApi.png","isFullStack":false,"readmeText":"# Node/Express API with simple JSON-file data source\n\nIf you need to set up a quick Node/Express API, this is a good project to begin with. It has a simple MVC structure with the server.ts file kept simple with the Express routes which call the corresponding functions in the model.ts file. There is one simple example of middleware, a logger which writes to a text file each time the API is accessed. The JSON file has more data than is needed so there is a light example of data cleansing from \"raw books\" to \"book\", see the IRawBook and IBook interfaces. As all my starter examples, this API uses TypeScript and ES6 modules exclusively. To add a new data source, simply change `model.ts` by swapping out the JSON-file code with code for your data source, e.g. a MongoDB or MySQL database, etc.\n\n\n\n## features\n\n- Node/Express API\n- TypeScript\n - two interfaces: `IRawBooks`, `IBooks`\n- ES6 modules\n- three simple routes:\n - `/` - API instructions\n - `/books` - all books\n - `/books/3` - book with id 3\n- simple MVC structure\n - `server.ts` - responsible for req/res routes\n - `model.ts` - responsible for data functions\n- simple example of custom middleware (logger)\n- `config.ts` has centralized data \n- `test.rest` used for manual testing (need [REST Client VSCode extension](https://marketplace.visualstudio.com/items?itemName=humao.rest-client))\n- cors implemented\n\n## install\n\n- go to your projects directory\n - e.g. `cd ~/projects`\n- in your projects directory, create your new site e.g. **backend001** by cloning this project \n - `git clone git@github.com:edwardtanguay/backend-simple-readonly-json-api.git backend001`\n- open your newly created site in VSCode\n - `code backend001`\n- inside VSCode, open the VSCode terminal\n - **CTRL-`**\n- delete the connection to this repository by deleting the Git repository\n - `rm -rf .git`\n- create a new local Git repository\n - `git init -b main`\n- install node_modules\n - `npm i`\n- start your site and click given link to view website\n - `npm run dev`\n\n## more starters, templates and frameworks\n\nhttps://starters.tanguay.eu","updowngradeItems":[{"text":"replace JSON data source with SQLite","idCode":"sqliteReadonly"}],"learningMaterialItems":[],"todoItems":[],"externalForkItems":[]},{"id":6,"idCode":"sqliteReadonly","title":"Fullstack React site that uses backend API with SQLite data source","description":"This is an example of a fullstack app that has an API in the backend which serves data from a db.sqlite file, i.e. a SQLite database. An SQLite database has the advantage that it is simply a file which can be copied, moved and deleted like any other file yet enables an quite robust SQL experience providing the ability to have dozens or hundreds of tables, and the powerful SQL query language with JOIN, UNION, GROUP BY, DISTINCT, etc. A disadvantage of SQLite is the lack of user management including authentication/authorization, but you can handle this externally, and particularly if you have a readonly SQLite database for which all data in the database is accessible to any user, as is the case in this project, SQLite gives you a very fast solution to data querying for an API.","featureMarkdown":"- **BACKEND**\n - Node/Express API\n - TypeScript / ES6 modules\n - SQLite\n - uses [better-sqlite3](https://www.npmjs.com/package/better-sqlite3)\n - since the SQLite database is a file, i.e. has no connection string, it has to be accessed via absolute file path, this has been tested to work on Windows, Linux and Mac, see `tools.absolutifyPathAndFileName()`\n - your can manage your SQLite database with **DB Browser**, a free application that runs on Windows/Mac/Linux`, see [HOWTO: How to install DB Browser for SQLite on Windows and Ubuntu and retrieve/change data in an SQLite database](https://edwardtanguay.vercel.app/howtos?id=574)\n - four API routes: [https://sqlite-readonly-backend.tkserv.eu](https://sqlite-readonly-backend.tkserv.eu)\n - MVC structure\n - `server.ts` - responsible for req/res routes\n - `model.ts` - responsible for data functions\n - `test.rest` used for manual testing (need [REST Client VSCode extension](https://marketplace.visualstudio.com/items?itemName=humao.rest-client))\n - cors implemented\n- **FRONTEND**\n - Vite React\n - React Router menu\n - useContext\n - axios","githubUrl":"https://github.com/edwardtanguay/sqlite-readonly-frontend","githubUrl2":"https://github.com/edwardtanguay/sqlite-readonly-backend","installMarkdown":"## install\n\n- go to your projects directory\n- create a directory with the name of your site, e.g. `site001`\n\n## install backend\n\n- go to your projects directory\n- `cd site001`\n- `git clone git@github.com:edwardtanguay/sqlite-readonly-backend.git .`\n- `npm i`\n- create **.env** file\n\n```text\nPORT = 3701\n```\n\n- `npm run dev`\n\n## install frontend\n\n- go to your projects directory\n- `cd site001`\n- `git clone git@github.com:edwardtanguay/sqlite-readonly-frontend.git .`\n- `npm i`\n- create **.env** file\n\n```text\nVITE_BACKEND_URL = http://localhost:3701\n```\n\n- `npm run dev`","demoUrl":"https://sqlite-readonly.tkserv.eu","updowngradeList":"replace SQLite data source with JSON files|backendSimpleReadonlyJsonApi","learningMaterialList":"HOWTO: How to set up and use SQLite on Windows and Ubuntu|https://edwardtanguay.vercel.app/howtos?id=575;HOWTO: How to install DB Browser for SQLite on Windows and Ubuntu and retrieve/change data in an SQLite database|https://edwardtanguay.vercel.app/howtos?id=574","todoList":"","externalForkList":"","hasAnimation":true,"imageUrl":"http://starters-backend.tanguay.eu/images/starters/sqliteReadonly.png","isFullStack":true,"readmeText":"# Fullstack React site that uses backend API with SQLite data source\n\nThis is an example of a fullstack app that has an API in the backend which serves data from a db.sqlite file, i.e. a SQLite database. An SQLite database has the advantage that it is simply a file which can be copied, moved and deleted like any other file yet enables an quite robust SQL experience providing the ability to have dozens or hundreds of tables, and the powerful SQL query language with JOIN, UNION, GROUP BY, DISTINCT, etc. A disadvantage of SQLite is the lack of user management including authentication/authorization, but you can handle this externally, and particularly if you have a readonly SQLite database for which all data in the database is accessible to any user, as is the case in this project, SQLite gives you a very fast solution to data querying for an API.\n\n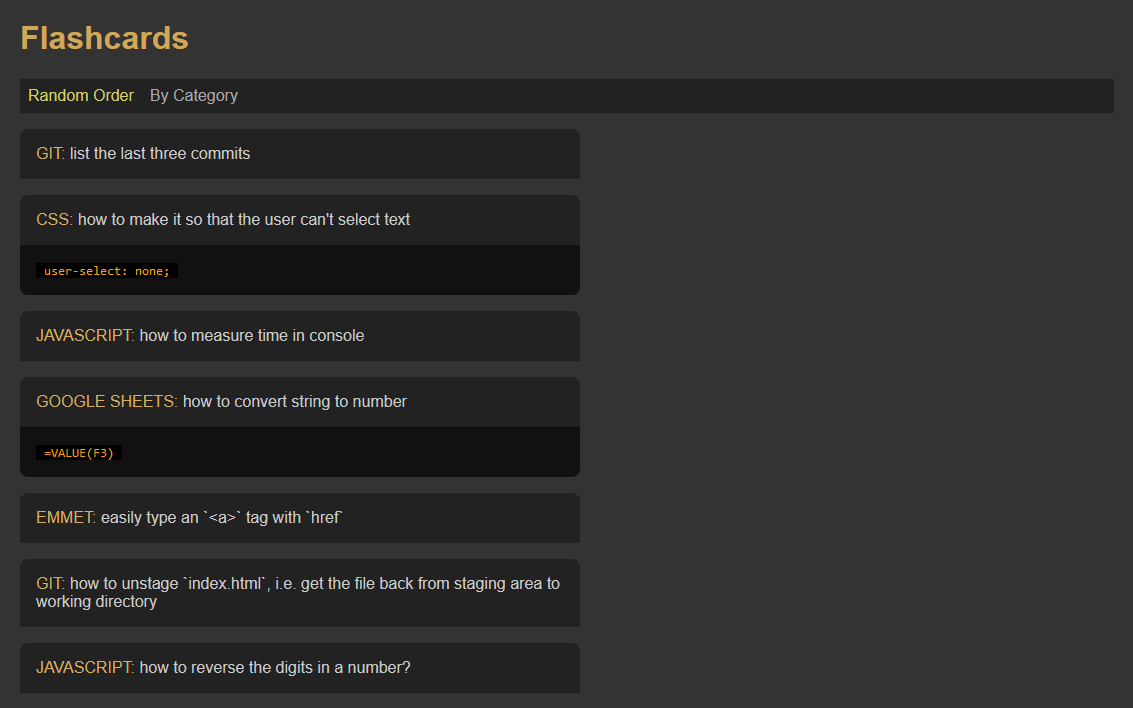\n\n## features\n\n- **BACKEND**\n - Node/Express API\n - TypeScript / ES6 modules\n - SQLite\n - uses [better-sqlite3](https://www.npmjs.com/package/better-sqlite3)\n - since the SQLite database is a file, i.e. has no connection string, it has to be accessed via absolute file path, this has been tested to work on Windows, Linux and Mac, see `tools.absolutifyPathAndFileName()`\n - your can manage your SQLite database with **DB Browser**, a free application that runs on Windows/Mac/Linux`, see [HOWTO: How to install DB Browser for SQLite on Windows and Ubuntu and retrieve/change data in an SQLite database](https://edwardtanguay.vercel.app/howtos?id=574)\n - four API routes: [https://sqlite-readonly-backend.tkserv.eu](https://sqlite-readonly-backend.tkserv.eu)\n - MVC structure\n - `server.ts` - responsible for req/res routes\n - `model.ts` - responsible for data functions\n - `test.rest` used for manual testing (need [REST Client VSCode extension](https://marketplace.visualstudio.com/items?itemName=humao.rest-client))\n - cors implemented\n- **FRONTEND**\n - Vite React\n - React Router menu\n - useContext\n - axios\n\n## install\n\n- go to your projects directory\n- create a directory with the name of your site, e.g. `site001`\n\n## install backend\n\n- go to your projects directory\n- `cd site001`\n- `git clone git@github.com:edwardtanguay/sqlite-readonly-backend.git .`\n- `npm i`\n- create **.env** file\n\n```text\nPORT = 3701\n```\n\n- `npm run dev`\n\n## install frontend\n\n- go to your projects directory\n- `cd site001`\n- `git clone git@github.com:edwardtanguay/sqlite-readonly-frontend.git .`\n- `npm i`\n- create **.env** file\n\n```text\nVITE_BACKEND_URL = http://localhost:3701\n```\n\n- `npm run dev`\n\n## more starters, templates and frameworks\n\nhttps://starters.tanguay.eu","updowngradeItems":[{"text":"replace SQLite data source with JSON files","idCode":"backendSimpleReadonlyJsonApi"}],"learningMaterialItems":[{"title":"HOWTO: How to set up and use SQLite on Windows and Ubuntu","url":"https://edwardtanguay.vercel.app/howtos?id=575"},{"title":"HOWTO: How to install DB Browser for SQLite on Windows and Ubuntu and retrieve/change data in an SQLite database","url":"https://edwardtanguay.vercel.app/howtos?id=574"}],"todoItems":[],"externalForkItems":[]},{"id":7,"idCode":"frontBackMernCrudLowdbPin","title":"Frontend/Backend MERN CRUD app with Lowdb and PIN authentication","description":"This is a fullstack MERN frontend/backend example app which has all the moving parts for you to deploy an application online to e.g. Hetzner which allows users who know the admin PIN to edit, delete and add new items online. This is a good basis to study, learn and use if you have React/Node/Express skills but not yet database or auth security skills. It has everything you need to publish an online website in which users can identify themselves and change content online. Note that if you want to build a job-application management app, this is a useful basis which can be used as is. Otherwise you will have to replace the content with your own.","featureMarkdown":"- **frontend:** Vite/React with Sass, TypeScript and ES6 modules\n- **backend:** Node/Express with TypeScript and ES6 modules\n- **database:** [Lowdb](https://www.npmjs.com/package/lowdb) (one JSON file in backend)\n- **authentication:** simple PIN which is an environment variable in the backend, i.e. all POST/PATCH/DELETE backend routes are protected\n- **toastify notifications**: easy-to-implement app messages that pop out with animation in e.g. upper-right-hand corner, see [react-toastify](https://www.npmjs.com/package/react-toastify)","githubUrl":"https://github.com/edwardtanguay/getajob007-frontend","githubUrl2":"https://github.com/edwardtanguay/getajob007-backend","installMarkdown":"## install\n\n- go to your projects directory\n- create a directory called `getajob`\n\n## install backend\n\n- go to your projects directory\n- `cd getajob`\n- `git clone git@github.com:edwardtanguay/getajob007-backend.git`\n- `npm i`\n- create **.env** file\n\n```text\nPORT = 3001\nPIN = 1234\n```\n\n- `npm run dev`\n\n## install frontend\n\n- go to your projects directory\n- `cd getajob`\n- `git clone git@github.com:edwardtanguay/getajob007-frontend.git`\n- `npm i`\n- create **.env** file\n\n```text\nVITE_BACKEND_URL = http://localhost:3001\n```\n\n- `npm run dev`","demoUrl":"https://getajob007.tanguay.eu","updowngradeList":"","learningMaterialList":"","todoList":"","externalForkList":"","hasAnimation":true,"imageUrl":"http://starters-backend.tanguay.eu/images/starters/frontBackMernCrudLowdbPin.png","isFullStack":true,"readmeText":"# Frontend/Backend MERN CRUD app with Lowdb and PIN authentication\n\nThis is a fullstack MERN frontend/backend example app which has all the moving parts for you to deploy an application online to e.g. Hetzner which allows users who know the admin PIN to edit, delete and add new items online. This is a good basis to study, learn and use if you have React/Node/Express skills but not yet database or auth security skills. It has everything you need to publish an online website in which users can identify themselves and change content online. Note that if you want to build a job-application management app, this is a useful basis which can be used as is. Otherwise you will have to replace the content with your own.\n\n\n\n## features\n\n- **frontend:** Vite/React with Sass, TypeScript and ES6 modules\n- **backend:** Node/Express with TypeScript and ES6 modules\n- **database:** [Lowdb](https://www.npmjs.com/package/lowdb) (one JSON file in backend)\n- **authentication:** simple PIN which is an environment variable in the backend, i.e. all POST/PATCH/DELETE backend routes are protected\n- **toastify notifications**: easy-to-implement app messages that pop out with animation in e.g. upper-right-hand corner, see [react-toastify](https://www.npmjs.com/package/react-toastify)\n\n## install\n\n- go to your projects directory\n- create a directory called `getajob`\n\n## install backend\n\n- go to your projects directory\n- `cd getajob`\n- `git clone git@github.com:edwardtanguay/getajob007-backend.git`\n- `npm i`\n- create **.env** file\n\n```text\nPORT = 3001\nPIN = 1234\n```\n\n- `npm run dev`\n\n## install frontend\n\n- go to your projects directory\n- `cd getajob`\n- `git clone git@github.com:edwardtanguay/getajob007-frontend.git`\n- `npm i`\n- create **.env** file\n\n```text\nVITE_BACKEND_URL = http://localhost:3001\n```\n\n- `npm run dev`\n\n## more starters, templates and frameworks\n\nhttps://starters.tanguay.eu","updowngradeItems":[],"learningMaterialItems":[],"todoItems":[],"externalForkItems":[]},{"id":8,"idCode":"reactNodeSimpleApi","title":"React frontend with simple Node/Express API backend","description":"This is the minimal starting point for a basic React-frontend with Node/Express-backend. Frontend is Vite React with Sass, React Router, useContext and a CLI command to create pages (`npm run cp`), while the backend is a minimal Node/Express but with a simple MVC structure with server.ts which calls a function in model.ts. This is a good project if you want to build a multi-page application that has a backend that serves it data.","featureMarkdown":"- **frontend:** \n - Vite/React \n - Sass\n - TypeScript\n - ES6 modules\n - React Router\n - useContext\n- **backend:** \n - Node/Express \n - TypeScript \n - ES6 modules\n - simple MVC Structure (`server.ts`/`model.ts`)","githubUrl":"https://github.com/edwardtanguay/react-node-simple-api-frontend","githubUrl2":"https://github.com/edwardtanguay/react-node-simple-api-backend","installMarkdown":"## install\n\n- go to your projects directory\n- create a directory called `site001`\n\n## install backend\n\n- go to your projects directory\n- `cd site001`\n- `git clone git@github.com:edwardtanguay/react-node-simple-api-backend.git site001-backend`\n- `npm i`\n- `npm run dev`\n\n## install frontend\n\n- go to your projects directory\n- `cd site001`\n- `git clone git@github.com:edwardtanguay/react-node-simple-api-frontend.git site001-frontend`\n- `npm i`\n- `npm run dev`","demoUrl":"","updowngradeList":"add authentication|reactNodeSimpleAdminAuth","learningMaterialList":"","todoList":"","externalForkList":"","hasAnimation":false,"imageUrl":"http://starters-backend.tanguay.eu/images/starters/reactNodeSimpleApi.png","isFullStack":true,"readmeText":"# React frontend with simple Node/Express API backend\n\nThis is the minimal starting point for a basic React-frontend with Node/Express-backend. Frontend is Vite React with Sass, React Router, useContext and a CLI command to create pages (`npm run cp`), while the backend is a minimal Node/Express but with a simple MVC structure with server.ts which calls a function in model.ts. This is a good project if you want to build a multi-page application that has a backend that serves it data.\n\n\n\n## features\n\n- **frontend:** \n - Vite/React \n - Sass\n - TypeScript\n - ES6 modules\n - React Router\n - useContext\n- **backend:** \n - Node/Express \n - TypeScript \n - ES6 modules\n - simple MVC Structure (`server.ts`/`model.ts`)\n\n## install\n\n- go to your projects directory\n- create a directory called `site001`\n\n## install backend\n\n- go to your projects directory\n- `cd site001`\n- `git clone git@github.com:edwardtanguay/react-node-simple-api-backend.git site001-backend`\n- `npm i`\n- `npm run dev`\n\n## install frontend\n\n- go to your projects directory\n- `cd site001`\n- `git clone git@github.com:edwardtanguay/react-node-simple-api-frontend.git site001-frontend`\n- `npm i`\n- `npm run dev`\n\n## more starters, templates and frameworks\n\nhttps://starters.tanguay.eu","updowngradeItems":[{"text":"add authentication","idCode":"reactNodeSimpleAdminAuth"}],"learningMaterialItems":[],"todoItems":[],"externalForkItems":[]},{"id":9,"idCode":"reactNodeSimpleAdminAuth","title":"React/Node/Express frontend/backend with admin authentication","description":"This is the minimal starting point for a basic React-frontend with Node/Express-backend with has authentication. Use this starter if you plan to create a backend that has POST, PUT, PATCH or DELETE routes which you need to protect on your backend and need to be able to allow a user on the frontend to log log in with password in order to access those routes. Authentication is done with session/cookies and kept as simple as possible, i.e. only one user (admin) can log in who then has admin rights on the front and backend for a specific amount of time, set at 10 seconds in order to test it first. The admin is able to edit a welcome message which in the backend is stored in a text file, so there is no database set up. You'll have to delete what you don't need and add what you need, but quite a bit of configuration and implementation details is set up for you on as boilerplate that works. Frontend is Vite React with Sass, React Router, useContext and a CLI command to create pages (`npm run cp`), while the backend is a minimal Node/Express but with a simple MVC structure with `server.ts` which calls a corresponding function in `model.ts`. This is a good project if you want to build a multi-page application that has CRUD operations and will be hosted online.","featureMarkdown":"\n- **frontend:** \n - Vite/React \n - Sass\n - TypeScript\n - ES6 modules\n - React Router\n - useContext\n - admin login with password\n- **backend:** \n - Node/Express \n - TypeScript \n - ES6 modules\n - simple MVC Structure (`server.ts`/`model.ts`)\n - cookie/session authentication","githubUrl":"https://github.com/edwardtanguay/react-node-simple-admin-auth-frontend","githubUrl2":"https://github.com/edwardtanguay/react-node-simple-admin-auth-backend","installMarkdown":"## install\n\n- go to your projects directory\n- create a directory called `site001`\n\n## install backend\n\n- go to your projects directory\n- `cd site001`\n- `git clone git@github.com:edwardtanguay/react-node-simple-admin-auth-backend.git site001-backend`\n- `npm i`\n- `npm run dev`\n\n## install frontend\n\n- go to your projects directory\n- `cd site001`\n- `git clone git@github.com:edwardtanguay/react-node-simple-admin-auth-backend.git site001-frontend`\n- `npm i`\n- `npm run dev`","demoUrl":"","updowngradeList":"remove authentication|reactNodeSimpleApi","learningMaterialList":"","todoList":"","externalForkList":"","hasAnimation":true,"imageUrl":"http://starters-backend.tanguay.eu/images/starters/reactNodeSimpleAdminAuth.png","isFullStack":true,"readmeText":"# React/Node/Express frontend/backend with admin authentication\n\nThis is the minimal starting point for a basic React-frontend with Node/Express-backend with has authentication. Use this starter if you plan to create a backend that has POST, PUT, PATCH or DELETE routes which you need to protect on your backend and need to be able to allow a user on the frontend to log log in with password in order to access those routes. Authentication is done with session/cookies and kept as simple as possible, i.e. only one user (admin) can log in who then has admin rights on the front and backend for a specific amount of time, set at 10 seconds in order to test it first. The admin is able to edit a welcome message which in the backend is stored in a text file, so there is no database set up. You'll have to delete what you don't need and add what you need, but quite a bit of configuration and implementation details is set up for you on as boilerplate that works. Frontend is Vite React with Sass, React Router, useContext and a CLI command to create pages (`npm run cp`), while the backend is a minimal Node/Express but with a simple MVC structure with `server.ts` which calls a corresponding function in `model.ts`. This is a good project if you want to build a multi-page application that has CRUD operations and will be hosted online.\n\n\n\n## features\n\n\n- **frontend:** \n - Vite/React \n - Sass\n - TypeScript\n - ES6 modules\n - React Router\n - useContext\n - admin login with password\n- **backend:** \n - Node/Express \n - TypeScript \n - ES6 modules\n - simple MVC Structure (`server.ts`/`model.ts`)\n - cookie/session authentication\n\n## install\n\n- go to your projects directory\n- create a directory called `site001`\n\n## install backend\n\n- go to your projects directory\n- `cd site001`\n- `git clone git@github.com:edwardtanguay/react-node-simple-admin-auth-backend.git site001-backend`\n- `npm i`\n- `npm run dev`\n\n## install frontend\n\n- go to your projects directory\n- `cd site001`\n- `git clone git@github.com:edwardtanguay/react-node-simple-admin-auth-backend.git site001-frontend`\n- `npm i`\n- `npm run dev`\n\n## more starters, templates and frameworks\n\nhttps://starters.tanguay.eu","updowngradeItems":[{"text":"remove authentication","idCode":"reactNodeSimpleApi"}],"learningMaterialItems":[],"todoItems":[],"externalForkItems":[]},{"id":10,"idCode":"fullstackReactSqliteCrud","title":"Fullstack React frontend which adds/edits/deletes items in backend SQLite CRUD API","description":"This is the starting point for the simplest fullstack CRUD site that has a database. There is a React-frontend which allows the user to view, edit, delete and add flashcards, which are saved via a Node/Express-backend to an SQLite database (a `db.sqlite` file on the backend. The authentication is simply an admin password stored in an `.env` file in the backend. So there is only one user (admin) which logs in simply by typing a password on the frontend, and if correct, can edit/delete/add flashcard items. The UX is quite advanced: animated toaster notifications, forms allow Enter to save, forms appear with cursors focused in the first input field, and all access to backend will gracefully fail if there is a network error, e.g. if you stop the backend, the site will show a spinner for two seconds before displaying a message that the database is currently unavailable. All connection to the backend is done in useContext fo course. This is a good project if you want to build a fullstack application which has quite complete UX and frontend/backend communication, would be e.g. easy to swap out the SQLite database for MySQL, Postgres, MongoDB or even a Lowdb JSON file.","featureMarkdown":"- **frontend:** \n\t- Vite/React \n\t- Sass\n\t- TypeScript\n\t- ES6 modules\n\t- React Router\n\t- useContext\n\t- admin login with password\n\t- [react-toastify](https://www.npmjs.com/package/react-toastify) notifications\n\t- UX features:\n\t\t- forms have automatically focused cursors\n\t\t- in forms, Enter means Save\n\t\t- graceful fail on network error (when backend not present)\n- **backend:** \n\t- Node/Express \n\t- TypeScript \n\t- ES6 modules\n\t- simple MVC structure (`server.ts`/`model.ts`)\n\t- cookie/session authentication\n\t- SQLite database (file: `data/db.sqlite`)","githubUrl":"https://github.com/edwardtanguay/fullstack-react-sqlite-crud-frontend","githubUrl2":"https://github.com/edwardtanguay/fullstack-react-sqlite-crud-backend","installMarkdown":"## install\n\n- open your terminal\n- create a directory for this project, e.g.\n\t- `mkdir site001`\n\n## install backend\n\n- enter your project directory\n\t- `cd site001`\n- create backend directory\n\t- `git clone git@github.com:edwardtanguay/fullstack-react-sqlite-crud-backend.git site001-backend`\n- open VSCode in the backend directory\n\t- `code site001-backend`\n- open VSCode terminal\n- delete old and create new Git repository\n\t- `rm -rf .git`\n\t- `git init -b main`\n\t- make initial commit\n- create `.env` file with **any random characters** for the session secret, and an **admin password** you can remember\n\n```text\nSESSION_SECRET = ksks2374skjdf\nADMIN_PASSWORD = pass828\n```\n\n- install node_modules\n\t- `npm i`\n- start the backend\n\t- `npm run dev`\n- open API in browser\n\t- click url in terminal\n- to distinguish your backend VSCode from your frontend VSCode, set the frame color\n\t- you need the [VSCode Peacock extension](https://marketplace.visualstudio.com/items?itemName=johnpapa.vscode-peacock)\n\t- **F1**\n\t- \"Peacock: Enter a Color\"\n\t- `navy` (**b**lue for **b**ackend)\n\n## install frontend\n\n- enter your project directory\n\t- `cd site001`\n- create frontend directory\n\t- `git clone git@github.com:edwardtanguay/fullstack-react-sqlite-crud-backend.git site001-frontend`\n- open VSCode in the frontend directory\n\t- `code site001-frontend`\n- open VSCode terminal\n- delete old and create new Git repository\n\t- `rm -rf .git`\n\t- `git init -b main`\n\t- make initial commit\n- no `.env` file is necessary for the frontend\n- install node_modules\n\t- `npm i`\n- start the backend\n\t- `npm run dev`\n- open in browser\n\t- click url in terminal\n- to distinguish your frontend VSCode from your backend VSCode, set the frame color\n\t- you need the [VSCode Peacock extension](https://marketplace.visualstudio.com/items?itemName=johnpapa.vscode-peacock)\n\t- **F1**\n\t- \"Peacock: Enter a Color\"\n\t- `purple` (**f**uchsia for **f**rontend)","demoUrl":"","updowngradeList":"","learningMaterialList":"","todoList":"","externalForkList":"","hasAnimation":true,"imageUrl":"http://starters-backend.tanguay.eu/images/starters/fullstackReactSqliteCrud.png","isFullStack":true,"readmeText":"# Fullstack React frontend which adds/edits/deletes items in backend SQLite CRUD API\n\nThis is the starting point for the simplest fullstack CRUD site that has a database. There is a React-frontend which allows the user to view, edit, delete and add flashcards, which are saved via a Node/Express-backend to an SQLite database (a `db.sqlite` file on the backend. The authentication is simply an admin password stored in an `.env` file in the backend. So there is only one user (admin) which logs in simply by typing a password on the frontend, and if correct, can edit/delete/add flashcard items. The UX is quite advanced: animated toaster notifications, forms allow Enter to save, forms appear with cursors focused in the first input field, and all access to backend will gracefully fail if there is a network error, e.g. if you stop the backend, the site will show a spinner for two seconds before displaying a message that the database is currently unavailable. All connection to the backend is done in useContext fo course. This is a good project if you want to build a fullstack application which has quite complete UX and frontend/backend communication, would be e.g. easy to swap out the SQLite database for MySQL, Postgres, MongoDB or even a Lowdb JSON file.\n\n\n\n## features\n\n- **frontend:** \n\t- Vite/React \n\t- Sass\n\t- TypeScript\n\t- ES6 modules\n\t- React Router\n\t- useContext\n\t- admin login with password\n\t- [react-toastify](https://www.npmjs.com/package/react-toastify) notifications\n\t- UX features:\n\t\t- forms have automatically focused cursors\n\t\t- in forms, Enter means Save\n\t\t- graceful fail on network error (when backend not present)\n- **backend:** \n\t- Node/Express \n\t- TypeScript \n\t- ES6 modules\n\t- simple MVC structure (`server.ts`/`model.ts`)\n\t- cookie/session authentication\n\t- SQLite database (file: `data/db.sqlite`)\n\n## install\n\n- open your terminal\n- create a directory for this project, e.g.\n\t- `mkdir site001`\n\n## install backend\n\n- enter your project directory\n\t- `cd site001`\n- create backend directory\n\t- `git clone git@github.com:edwardtanguay/fullstack-react-sqlite-crud-backend.git site001-backend`\n- open VSCode in the backend directory\n\t- `code site001-backend`\n- open VSCode terminal\n- delete old and create new Git repository\n\t- `rm -rf .git`\n\t- `git init -b main`\n\t- make initial commit\n- create `.env` file with **any random characters** for the session secret, and an **admin password** you can remember\n\n```text\nSESSION_SECRET = ksks2374skjdf\nADMIN_PASSWORD = pass828\n```\n\n- install node_modules\n\t- `npm i`\n- start the backend\n\t- `npm run dev`\n- open API in browser\n\t- click url in terminal\n- to distinguish your backend VSCode from your frontend VSCode, set the frame color\n\t- you need the [VSCode Peacock extension](https://marketplace.visualstudio.com/items?itemName=johnpapa.vscode-peacock)\n\t- **F1**\n\t- \"Peacock: Enter a Color\"\n\t- `navy` (**b**lue for **b**ackend)\n\n## install frontend\n\n- enter your project directory\n\t- `cd site001`\n- create frontend directory\n\t- `git clone git@github.com:edwardtanguay/fullstack-react-sqlite-crud-backend.git site001-frontend`\n- open VSCode in the frontend directory\n\t- `code site001-frontend`\n- open VSCode terminal\n- delete old and create new Git repository\n\t- `rm -rf .git`\n\t- `git init -b main`\n\t- make initial commit\n- no `.env` file is necessary for the frontend\n- install node_modules\n\t- `npm i`\n- start the backend\n\t- `npm run dev`\n- open in browser\n\t- click url in terminal\n- to distinguish your frontend VSCode from your backend VSCode, set the frame color\n\t- you need the [VSCode Peacock extension](https://marketplace.visualstudio.com/items?itemName=johnpapa.vscode-peacock)\n\t- **F1**\n\t- \"Peacock: Enter a Color\"\n\t- `purple` (**f**uchsia for **f**rontend)\n\n## more starters, templates and frameworks\n\nhttps://starters.tanguay.eu","updowngradeItems":[],"learningMaterialItems":[],"todoItems":[],"externalForkItems":[]},{"id":11,"idCode":"mernMongooseBookCrudFullstack","title":"Fullstack MERN site which allows user to add/edit/delete items via CRUD API using MongoDB and TypeScript/ES6-Modules on frontend/backend","description":"This starter is not only a good way to learn the basic skills of building a full-stack MERN site with admin login and item editing, but you can also use this site as a basis to create sites where you can log in as admin, edit/delete/add items and then log out again. Since it uses React, this is ideal for making an app-like site on your smart phone that you log into on the go to change and add information. There is only one user (admin), the password is saved in text in the backend .env file. In this way, the app is simplified for learning purposes but this site could be used for a wide range of personal or company and sites that need to have an admin keep the site up-to-date with new information.","featureMarkdown":"- **frontend:** \n\t- Vite/React\n\t- Sass\n\t- TypeScript / ES6 modules\n\t- React Router\n\t- useContext\n\t- admin login with password\n\t- react-helmet\n\t- axios \n\n- **backend:** \n\t- Node/Express \n\t- TypeScript / ES6 modules\n\t- simple MVC structure (`server.ts`/`model.ts`)\n\t- cookie/session authentication\n\t- MongoDB (local or Atlas)\n\t- Mongoose\n\t- no try/catch error handling for learning simplicity","githubUrl":"https://github.com/edwardtanguay/et-mern-crud-site-frontend","githubUrl2":"https://github.com/edwardtanguay/et-mern-crud-site-backend","installMarkdown":"## CREATE ONE PROJECT FOR BOTH BACKEND AND FRONTEND\n\n- open your terminal and go to your project directory\n- create a directory for this project, e.g.\n - `mkdir et-mern-crud-site`\n\n## INSTALL BACKEND\n\n### set up directory and editor for backend\n\n- enter your project directory\n - `cd et-mern-crud-site`\n- create backend directory\n - `git clone git@github.com:edwardtanguay/et-mern-crud-site-backend.git et-mern-crud-site-backend`\n- open VSCode in the backend directory\n - `code et-mern-crud-site-backend`\n- open VSCode terminal\n- install node_modules\n - `npm i`\n- delete old and create new Git repository\n - `rm -rf .git`\n - `git init -b main`\n - make initial commit\n- to distinguish your backend VSCode from your frontend VSCode, set the frame color\n - you need the [VSCode Peacock extension](https://marketplace.visualstudio.com/items?itemName=johnpapa.vscode-peacock)\n - **F1**\n - \"Peacock: Enter a Color\"\n - `navy` (**b**lue for **b**ackend)\n\n### create database\n\n- in your MongoDB Atlas cluster, create a MongoDB database with the name of your project, e.g. `et-mern-crud-site`\n- create a collection in it called `books`\n- import the file `dev/books.json` into the collection `books` (e.g. with MongoDB Compass)\n\n### create .env file for backend\n\n- create a `.env` file in the root directory of your project and copy in the following content\n\n ``` text\n APP_NAME = Book Site API\n SECONDS_TILL_SESSION_TIMEOUT = 3600 \n PORT = 5001\n MONGODB_CONNECTION = mongodb+srv://USERNAME:PASSWORD@cluster0.ogshn.mongodb.net/DATABASENAME?retryWrites=true&w=majority\n SESSION_SECRET = RANDOMSTRING\n ADMIN_PASSWORD = ADMINPASSWORD\n FRONTEND_URL = http://localhost:5002\n NODE_ENVIRONMENT = development\n ```\n\n- replace all capitalized variables with appropriate data\n - USERNAME\n - PASSWORD\n - DATABASENAME\n - RANDOMSTRING\n - ADMINPASSWORD\n- you can also change the backend/frontend ports if you need to, e.g. to avoid conflicts\n\n\n### start and test the backend\n\n- `npm run dev`\n- click on URL shown in the terminal (e.g. http://localhost:5001)\n- click on `/books` link\n- change data in your MongoDB database to see that the changes are reflected in the browser\n\n## INSTALL FRONTEND\n\n### set up directory and editor for frontend\n\n- enter your project directory\n - `cd et-mern-crud-site`\n- create frontend directory\n - `git clone git@github.com:edwardtanguay/et-mern-crud-site-frontend.git et-mern-crud-site-frontend`\n- open VSCode in the frontend directory\n - `code et-mern-crud-site-frontend`\n- open VSCode terminal\n- install node_modules\n - `npm i`\n- delete old and create new Git repository\n - `rm -rf .git`\n - `git init -b main`\n - make initial commit\n- to distinguish your frontend VSCode from your backend VSCode, set the frame color\n - you need the [VSCode Peacock extension](https://marketplace.visualstudio.com/items?itemName=johnpapa.vscode-peacock)\n - **F1**\n - \"Peacock: Enter a Color\"\n - `purple` (**f**uchsia for **f**rontend)\n\n### create .env file for frontend\n\n- create an `.env` file in the root directory of your project\n- copy in the following content and change backend port if necessary\n\n ``` text\n VITE_BACKEND_URL = http://localhost:5001\n ```\n \n### start the frontend\n\n- `npm run dev`\n- open in browser\n- click url in terminal\n\n## DEPLOY BACKEND TO LINUX CLOUD SERVER AT HETZNER\n\n- in your npm scripts, change all references of `et-mern-crud-site` to your site name\n\n ``` text\n \"scripts\": {\n \"dev\": \"nodemon\",\n \"build\": \"tsc\",\n \"setup\": \"pm2 start --name et-mern-crud-site-backend npm -- start\",\n \"start\": \"node dist/server.js\",\n \"deploy\": \"git pull --no-rebase && npm i && npm run build && pm2 restart et-mern-crud-site-backend --update-env --time && pm2 save\"\n },\n ```\n\n- push your backend to a repository on GitHub\n- SSH into your Hetzner account\n- go to your web projects directory, e.g.\n - e.g. `/var/www`\n- clone your repository there\n - e.g. `git clone git@github.com:edwardtanguay/et-mern-crud-site-backend.git`\n- navigate into your backend project directory\n - e.g. `cd et-mern-crud-site-backend`\n- set up `.env` file\n - replace all capitalized variables with appropriate data\n - USERNAME\n - PASSWORD\n - DATABASENAME\n - RANDOMSTRING\n - ADMINPASSWORD\n - change the FRONTEND_URL appropriately\n\n ``` text\n APP_NAME = Book Site API\n SECONDS_TILL_SESSION_TIMEOUT = 3600 \n PORT = 5001\n MONGODB_CONNECTION = mongodb+srv://USERNAME:PASSWORD@cluster0.ogshn.mongodb.net/DATABASENAME?retryWrites=true&w=majority\n SESSION_SECRET = RANDOMSTRING\n ADMIN_PASSWORD = ADMINPASSWORD\n FRONTEND_URL = https://et-mern-crud-site.tanguay.eu\n NODE_ENVIRONMENT = production\n ```\n\n- set up the site in pm2\n - `npm run setup`\n- deploy your site\n - `npm run deploy`\n- test that your application is running\n - in your firewall, add incoming rule for port 5001\n - in your browser, go to e.g. `http://tanguay.eu:5001` (not https)\n - you should see your backend running in the browser\n - in your firewall, remove the rule again\n- set up a subdomain for your site, e.g. `et-mern-crud-site-backend.tanguay.eu`\n- create nginx config file for your backend site\n - e.g. `/etc/nginx/conf.d/et-mern-crud-site-backend.conf`\n\n ``` text\n server {\n server_name et-mern-crud-site-backend.tanguay.eu;\n location / {\n proxy_pass http://tanguay.eu:5001;\n }\n }\n ```\n\n- register the https certificate for this subdomain\n - `sudo certbot --nginx`\n - choose the number of your site\n- restart the nginx server\n - `sudo systemctl restart nginx`\n- in your browser, go to your site at e.g. [https://et-mern-crud-site-backend.tanguay.eu](https://et-mern-crud-site-backend.tanguay.eu)\n\n## DEPLOY FRONTEND TO LINUX CLOUD SERVER AT HETZNER\n\n- in your npm scripts, change all references of `et-mern-crud-site` to your site name\n\n ``` text\n \"scripts\": {\n \"dev\": \"vite\",\n \"build\": \"tsc && vite build\",\n \"preview\": \"vite preview\",\n \"cp\": \"node cli/cp.mjs\",\n \"setup\": \"pm2 start --name et-mern-crud-site-frontend npm -- start\",\n \"start\": \"vite preview --host --port 5002\",\n \"deploy\": \"git pull --no-rebase && npm i && npm run build && pm2 restart et-mern-crud-site-frontend --update-env --time && pm2 save\"\n },\n ```\n \n- note: if you want to change your port in the **start** command, e.g. if 5002 is being used by other site:\n - 1. change it in the start command above\n - 2. also change it in the `vite.config.ts` file\n\n- push your frontend to a repository on GitHub\n- SSH into your Hetzner account\n- go to your web projects directory, e.g.\n - e.g. `/var/www`\n- clone your repository there\n - e.g. `git clone git@github.com:edwardtanguay/et-mern-crud-site-frontend.git`\n- navigate into your frontend project directory\n - e.g. `cd et-mern-crud-site-frontend`\n- create a `.env` file with the URL of the backend that you just set up\n\n ``` text\n VITE_BACKEND_URL = https://et-mern-crud-site-backend.tanguay.eu\n ```\n\n- set up the site in pm2\n - `npm run setup`\n- deploy your site\n - `npm run deploy`\n- test that your application is running\n - in your firewall, add incoming rule for port 5002\n - in your browser, go to e.g. `http://tanguay.eu:5002` (not https)\n - you should see your frontend running in the browser\n - in your firewall, remove the rule again\n- set up a subdomain for your site, e.g. `et-mern-crud-site.tanguay.eu` (without `-frontend`)\n- create nginx config file for your frontend site\n - e.g. `/etc/nginx/conf.d/et-mern-crud-site.conf` (without `-frontend`)\n\n ``` text\n server {\n server_name et-mern-crud-site.tanguay.eu;\n location / {\n proxy_pass http://tanguay.eu:5002;\n }\n }\n ```\n\n- register the https certificate for this subdomain\n - `sudo certbot --nginx`\n - choose the number of your site\n- restart the nginx server\n - `sudo systemctl restart nginx`\n- in your browser, go to your site at e.g. [https://et-mern-crud-site.tanguay.eu](https://et-mern-crud-site.tanguay.eu)","demoUrl":"https://et-mern-crud-site.tanguay.eu","updowngradeList":"switch to multiuser login|fullstackMernCrudWithMultipleUsersAndSessions","learningMaterialList":"","todoList":"","externalForkList":"add bcrypt and cryptr to protect admin and MongoDB passwords|https://github.com/edwardtanguay/merncrud022-backend; replace admin login with multiuser login|https://github.com/edwardtanguay/merncrud031-backend","hasAnimation":true,"imageUrl":"http://starters-backend.tanguay.eu/images/starters/mernMongooseBookCrudFullstack.png","isFullStack":true,"readmeText":"# Fullstack MERN site which allows user to add/edit/delete items via CRUD API using MongoDB and TypeScript/ES6-Modules on frontend/backend\n\nThis starter is not only a good way to learn the basic skills of building a full-stack MERN site with admin login and item editing, but you can also use this site as a basis to create sites where you can log in as admin, edit/delete/add items and then log out again. Since it uses React, this is ideal for making an app-like site on your smart phone that you log into on the go to change and add information. There is only one user (admin), the password is saved in text in the backend .env file. In this way, the app is simplified for learning purposes but this site could be used for a wide range of personal or company and sites that need to have an admin keep the site up-to-date with new information.\n\n\n\n## features\n\n- **frontend:** \n\t- Vite/React\n\t- Sass\n\t- TypeScript / ES6 modules\n\t- React Router\n\t- useContext\n\t- admin login with password\n\t- react-helmet\n\t- axios \n\n- **backend:** \n\t- Node/Express \n\t- TypeScript / ES6 modules\n\t- simple MVC structure (`server.ts`/`model.ts`)\n\t- cookie/session authentication\n\t- MongoDB (local or Atlas)\n\t- Mongoose\n\t- no try/catch error handling for learning simplicity\n\n## CREATE ONE PROJECT FOR BOTH BACKEND AND FRONTEND\n\n- open your terminal and go to your project directory\n- create a directory for this project, e.g.\n - `mkdir et-mern-crud-site`\n\n## INSTALL BACKEND\n\n### set up directory and editor for backend\n\n- enter your project directory\n - `cd et-mern-crud-site`\n- create backend directory\n - `git clone git@github.com:edwardtanguay/et-mern-crud-site-backend.git et-mern-crud-site-backend`\n- open VSCode in the backend directory\n - `code et-mern-crud-site-backend`\n- open VSCode terminal\n- install node_modules\n - `npm i`\n- delete old and create new Git repository\n - `rm -rf .git`\n - `git init -b main`\n - make initial commit\n- to distinguish your backend VSCode from your frontend VSCode, set the frame color\n - you need the [VSCode Peacock extension](https://marketplace.visualstudio.com/items?itemName=johnpapa.vscode-peacock)\n - **F1**\n - \"Peacock: Enter a Color\"\n - `navy` (**b**lue for **b**ackend)\n\n### create database\n\n- in your MongoDB Atlas cluster, create a MongoDB database with the name of your project, e.g. `et-mern-crud-site`\n- create a collection in it called `books`\n- import the file `dev/books.json` into the collection `books` (e.g. with MongoDB Compass)\n\n### create .env file for backend\n\n- create a `.env` file in the root directory of your project and copy in the following content\n\n ``` text\n APP_NAME = Book Site API\n SECONDS_TILL_SESSION_TIMEOUT = 3600 \n PORT = 5001\n MONGODB_CONNECTION = mongodb+srv://USERNAME:PASSWORD@cluster0.ogshn.mongodb.net/DATABASENAME?retryWrites=true&w=majority\n SESSION_SECRET = RANDOMSTRING\n ADMIN_PASSWORD = ADMINPASSWORD\n FRONTEND_URL = http://localhost:5002\n NODE_ENVIRONMENT = development\n ```\n\n- replace all capitalized variables with appropriate data\n - USERNAME\n - PASSWORD\n - DATABASENAME\n - RANDOMSTRING\n - ADMINPASSWORD\n- you can also change the backend/frontend ports if you need to, e.g. to avoid conflicts\n\n\n### start and test the backend\n\n- `npm run dev`\n- click on URL shown in the terminal (e.g. http://localhost:5001)\n- click on `/books` link\n- change data in your MongoDB database to see that the changes are reflected in the browser\n\n## INSTALL FRONTEND\n\n### set up directory and editor for frontend\n\n- enter your project directory\n - `cd et-mern-crud-site`\n- create frontend directory\n - `git clone git@github.com:edwardtanguay/et-mern-crud-site-frontend.git et-mern-crud-site-frontend`\n- open VSCode in the frontend directory\n - `code et-mern-crud-site-frontend`\n- open VSCode terminal\n- install node_modules\n - `npm i`\n- delete old and create new Git repository\n - `rm -rf .git`\n - `git init -b main`\n - make initial commit\n- to distinguish your frontend VSCode from your backend VSCode, set the frame color\n - you need the [VSCode Peacock extension](https://marketplace.visualstudio.com/items?itemName=johnpapa.vscode-peacock)\n - **F1**\n - \"Peacock: Enter a Color\"\n - `purple` (**f**uchsia for **f**rontend)\n\n### create .env file for frontend\n\n- create an `.env` file in the root directory of your project\n- copy in the following content and change backend port if necessary\n\n ``` text\n VITE_BACKEND_URL = http://localhost:5001\n ```\n \n### start the frontend\n\n- `npm run dev`\n- open in browser\n- click url in terminal\n\n## DEPLOY BACKEND TO LINUX CLOUD SERVER AT HETZNER\n\n- in your npm scripts, change all references of `et-mern-crud-site` to your site name\n\n ``` text\n \"scripts\": {\n \"dev\": \"nodemon\",\n \"build\": \"tsc\",\n \"setup\": \"pm2 start --name et-mern-crud-site-backend npm -- start\",\n \"start\": \"node dist/server.js\",\n \"deploy\": \"git pull --no-rebase && npm i && npm run build && pm2 restart et-mern-crud-site-backend --update-env --time && pm2 save\"\n },\n ```\n\n- push your backend to a repository on GitHub\n- SSH into your Hetzner account\n- go to your web projects directory, e.g.\n - e.g. `/var/www`\n- clone your repository there\n - e.g. `git clone git@github.com:edwardtanguay/et-mern-crud-site-backend.git`\n- navigate into your backend project directory\n - e.g. `cd et-mern-crud-site-backend`\n- set up `.env` file\n - replace all capitalized variables with appropriate data\n - USERNAME\n - PASSWORD\n - DATABASENAME\n - RANDOMSTRING\n - ADMINPASSWORD\n - change the FRONTEND_URL appropriately\n\n ``` text\n APP_NAME = Book Site API\n SECONDS_TILL_SESSION_TIMEOUT = 3600 \n PORT = 5001\n MONGODB_CONNECTION = mongodb+srv://USERNAME:PASSWORD@cluster0.ogshn.mongodb.net/DATABASENAME?retryWrites=true&w=majority\n SESSION_SECRET = RANDOMSTRING\n ADMIN_PASSWORD = ADMINPASSWORD\n FRONTEND_URL = https://et-mern-crud-site.tanguay.eu\n NODE_ENVIRONMENT = production\n ```\n\n- set up the site in pm2\n - `npm run setup`\n- deploy your site\n - `npm run deploy`\n- test that your application is running\n - in your firewall, add incoming rule for port 5001\n - in your browser, go to e.g. `http://tanguay.eu:5001` (not https)\n - you should see your backend running in the browser\n - in your firewall, remove the rule again\n- set up a subdomain for your site, e.g. `et-mern-crud-site-backend.tanguay.eu`\n- create nginx config file for your backend site\n - e.g. `/etc/nginx/conf.d/et-mern-crud-site-backend.conf`\n\n ``` text\n server {\n server_name et-mern-crud-site-backend.tanguay.eu;\n location / {\n proxy_pass http://tanguay.eu:5001;\n }\n }\n ```\n\n- register the https certificate for this subdomain\n - `sudo certbot --nginx`\n - choose the number of your site\n- restart the nginx server\n - `sudo systemctl restart nginx`\n- in your browser, go to your site at e.g. [https://et-mern-crud-site-backend.tanguay.eu](https://et-mern-crud-site-backend.tanguay.eu)\n\n## DEPLOY FRONTEND TO LINUX CLOUD SERVER AT HETZNER\n\n- in your npm scripts, change all references of `et-mern-crud-site` to your site name\n\n ``` text\n \"scripts\": {\n \"dev\": \"vite\",\n \"build\": \"tsc && vite build\",\n \"preview\": \"vite preview\",\n \"cp\": \"node cli/cp.mjs\",\n \"setup\": \"pm2 start --name et-mern-crud-site-frontend npm -- start\",\n \"start\": \"vite preview --host --port 5002\",\n \"deploy\": \"git pull --no-rebase && npm i && npm run build && pm2 restart et-mern-crud-site-frontend --update-env --time && pm2 save\"\n },\n ```\n \n- note: if you want to change your port in the **start** command, e.g. if 5002 is being used by other site:\n - 1. change it in the start command above\n - 2. also change it in the `vite.config.ts` file\n\n- push your frontend to a repository on GitHub\n- SSH into your Hetzner account\n- go to your web projects directory, e.g.\n - e.g. `/var/www`\n- clone your repository there\n - e.g. `git clone git@github.com:edwardtanguay/et-mern-crud-site-frontend.git`\n- navigate into your frontend project directory\n - e.g. `cd et-mern-crud-site-frontend`\n- create a `.env` file with the URL of the backend that you just set up\n\n ``` text\n VITE_BACKEND_URL = https://et-mern-crud-site-backend.tanguay.eu\n ```\n\n- set up the site in pm2\n - `npm run setup`\n- deploy your site\n - `npm run deploy`\n- test that your application is running\n - in your firewall, add incoming rule for port 5002\n - in your browser, go to e.g. `http://tanguay.eu:5002` (not https)\n - you should see your frontend running in the browser\n - in your firewall, remove the rule again\n- set up a subdomain for your site, e.g. `et-mern-crud-site.tanguay.eu` (without `-frontend`)\n- create nginx config file for your frontend site\n - e.g. `/etc/nginx/conf.d/et-mern-crud-site.conf` (without `-frontend`)\n\n ``` text\n server {\n server_name et-mern-crud-site.tanguay.eu;\n location / {\n proxy_pass http://tanguay.eu:5002;\n }\n }\n ```\n\n- register the https certificate for this subdomain\n - `sudo certbot --nginx`\n - choose the number of your site\n- restart the nginx server\n - `sudo systemctl restart nginx`\n- in your browser, go to your site at e.g. [https://et-mern-crud-site.tanguay.eu](https://et-mern-crud-site.tanguay.eu)\n\n## more starters, templates and frameworks\n\nhttps://starters.tanguay.eu","updowngradeItems":[{"text":"switch to multiuser login","idCode":"fullstackMernCrudWithMultipleUsersAndSessions"}],"learningMaterialItems":[],"todoItems":[],"externalForkItems":[{"title":"add bcrypt and cryptr to protect admin and MongoDB passwords","url":"https://github.com/edwardtanguay/merncrud022-backend"},{"title":"replace admin login with multiuser login","url":"https://github.com/edwardtanguay/merncrud031-backend"}]},{"id":12,"idCode":"fullstackMernCrudWithMultipleUsersAndSessions","title":"Fullstack MERN site which allows multiple users to add/edit/delete items via CRUD API using MongoDB and TypeScript/ES6-Modules on frontend/backend","description":"This starter is a base fullstack MERN site that allows you to have multiple users who can log into the site and see different pages (using React Router) and accomplish different tasks (e.g. admins can delete, edit and addd items). The backend is an API built on Node/Express saving data to a MongoDB database using Mongoose. ES6 modules and TypeScript are used on both backend and frontend (a React site created with Vite). Passwords are saved as hashes in the database with bcrypt. The app is simplified for learning purposes but is ready to use as a basis for any site that needs to have multiple users log in, view various data, and change data.","featureMarkdown":"- **frontend:** \n\t- Vite/React\n\t- Sass\n\t- TypeScript / ES6 modules\n\t- React Router\n\t- useContext\n\t- multiuser login with password\n\t- react-helmet\n\t- axios \n - lodash (cloneDeep)\n\n- **backend:** \n\t- Node/Express \n\t- TypeScript / ES6 modules\n\t- simple MVC structure (`server.ts`/`model.ts`)\n\t- cookie/session authentication\n\t- MongoDB (local or Atlas)\n\t- Mongoose\n\t- bcrypt for hasing passwords\n - CLI command to create bcrypt hashes\n - authorization pattern: accessGroups with anonymousUser","githubUrl":"https://github.com/edwardtanguay/merncrud051-frontend","githubUrl2":"https://github.com/edwardtanguay/merncrud051-backend","installMarkdown":"## CREATE ONE PROJECT FOR BOTH BACKEND AND FRONTEND\n\n- open your terminal and go to your project directory\n- create a directory for this project, e.g.\n - `mkdir merncrudmulti`\n\n## INSTALL BACKEND\n\n### set up directory and editor for backend\n\n- enter your project directory\n - `cd merncrudmulti`\n- create backend directory\n - `git clone git@github.com:edwardtanguay/merncrud051-backend.git merncrudmulti-backend`\n- open VSCode in the backend directory\n - `code merncrudmulti-backend`\n- open VSCode terminal\n- install node_modules\n - `npm i`\n- delete old and create new Git repository\n - `rm -rf .git`\n - `git init -b main`\n - make initial commit\n- to distinguish your backend VSCode from your frontend VSCode, set the frame color\n - you need the [VSCode Peacock extension](https://marketplace.visualstudio.com/items?itemName=johnpapa.vscode-peacock)\n - **F1**\n - \"Peacock: Enter a Color\"\n - `navy` (**b**lue for **b**ackend)\n\n### create database\n\n- in your MongoDB Atlas cluster, create a MongoDB database with the name of your project, e.g. `merncrudmulti`\n- create a collection in it called `books`\n- with MongoDB Compass, import the file `dev/books.json` into the collection `books`\n- create a collection in it called `users`\n- with MongoDB Compass, import the file `dev/users.json` into the collection `users`\n\n### create .env file for backend\n\n- create a `.env` file in the root directory of your project and copy in the following content\n\n ``` text\n APP_NAME = Book Site API\n SECONDS_TILL_SESSION_TIMEOUT = 3600\n PORT = 3210\n MONGODB_CONNECTION = mongodb://localhost:27017/merncrudmulti\n SESSION_SECRET = 8234skdfj2834\n FRONTEND_URL = http://localhost:3211\n NODE_ENVIRONMENT = development\n ```\n\n- you can also change the backend/frontend ports if you need to, e.g. to avoid conflicts\n\n\n### start and test the backend\n\n- `npm run dev`\n- click on URL shown in the terminal (e.g. http://localhost:3210)\n- click on `/books` link\n- change data in your MongoDB database to see that the changes are reflected in the browser\n- to test individual routes, see the `test.rest` file (you need the VSCode extension [Rest Client](https://marketplace.visualstudio.com/items?itemName=humao.rest-client))\n\n## INSTALL FRONTEND\n\n### set up directory and editor for frontend\n\n- enter your project directory\n - `cd merncrudmulti`\n- create frontend directory\n - `git clone git@github.com:edwardtanguay/merncrud051-frontend.git merncrudmulti-frontend`\n- open VSCode in the frontend directory\n - `code merncrudmulti-frontend`\n- open VSCode terminal\n- install node_modules\n - `npm i`\n- delete old and create new Git repository\n - `rm -rf .git`\n - `git init -b main`\n - make initial commit\n- to distinguish your frontend VSCode from your backend VSCode, set the frame color\n - you need the [VSCode Peacock extension](https://marketplace.visualstudio.com/items?itemName=johnpapa.vscode-peacock)\n - **F1**\n - \"Peacock: Enter a Color\"\n - `purple` (**f**uchsia for **f**rontend)\n\n### create .env file for frontend\n\n- create an `.env` file in the root directory of your project\n- copy in the following content and change backend port if necessary\n\n ``` text\n VITE_BACKEND_URL = http://localhost:3210\n ```\n \n### start the frontend\n\n- `npm run dev`\n- open in browser\n- click url in terminal\n\n## DEPLOY BACKEND TO LINUX CLOUD SERVER AT HETZNER\n\n- in your npm scripts, change all references of `merncrudmulti` to your site name\n\n ``` text\n \"scripts\": {\n \"dev\": \"nodemon\",\n \"build\": \"tsc\",\n \"setup\": \"pm2 start --name merncrudmulti-backend npm -- start\",\n \"start\": \"node dist/server.js\",\n \"deploy\": \"git pull --no-rebase && npm i && npm run build && pm2 restart merncrudmulti-backend --update-env --time && pm2 save\"\n },\n ```\n\n- push your backend to a repository on GitHub\n- SSH into your Hetzner account\n- go to your web projects directory, e.g.\n - e.g. `/var/www`\n- clone your repository there\n - e.g. `git clone git@github.com:edwardtanguay/merncrudmulti-backend.git`\n- navigate into your backend project directory\n - e.g. `cd merncrudmulti-backend`\n- set up `.env` file\n - replace all capitalized variables with appropriate data\n - USERNAME\n - PASSWORD\n\t- CLUSTERNAME\n - DATABASENAME\n - RANDOMSTRING\n - change the FRONTEND_URL appropriately\n\n ``` text\n APP_NAME = Book Site API\n SECONDS_TILL_SESSION_TIMEOUT = 3600 \n PORT = 3210\n MONGODB_CONNECTION = mongodb+srv://USERNAME:PASSWORD@cluster0.CLUSTERNAME.mongodb.net/DATABASENAME?retryWrites=true&w=majority\n SESSION_SECRET = RANDOMSTRING\n FRONTEND_URL = https://merncrudmulti.tanguay.eu\n NODE_ENVIRONMENT = production\n ```\n\n- set up the site in pm2\n - `npm run setup`\n- deploy your site\n - `npm run deploy`\n- test that your application is running\n - in your firewall, add incoming rule for port 3210\n - in your browser, go to e.g. `http://tanguay.eu:3210` (not https)\n - you should see your backend running in the browser\n - in your firewall, remove the rule again\n- set up a subdomain for your site, e.g. `merncrudmulti-backend.tanguay.eu`\n- create nginx config file for your backend site\n - e.g. `/etc/nginx/conf.d/merncrudmulti-backend.conf`\n\n ``` text\n server {\n server_name merncrudmulti-backend.tanguay.eu;\n location / {\n proxy_pass http://tanguay.eu:3210;\n }\n }\n ```\n\n- register the https certificate for this subdomain\n - `sudo certbot --nginx`\n - choose the number of your site\n- restart the nginx server\n - `sudo systemctl restart nginx`\n- in your browser, go to your site at e.g. [https://merncrudmulti-backend.tanguay.eu](https://merncrudmulti-backend.tanguay.eu)\n\n## DEPLOY FRONTEND TO LINUX CLOUD SERVER AT HETZNER\n\n- in your npm scripts, change all references of `merncrudmulti` to your site name\n\n ``` text\n \"scripts\": {\n \"dev\": \"vite\",\n \"build\": \"tsc && vite build\",\n \"preview\": \"vite preview\",\n \"cp\": \"node cli/cp.mjs\",\n \"setup\": \"pm2 start --name merncrudmulti-frontend npm -- start\",\n \"start\": \"vite preview --host --port 3211\",\n \"deploy\": \"git pull --no-rebase && npm i && npm run build && pm2 restart merncrudmulti-frontend --update-env --time && pm2 save\"\n },\n ```\n \n- note: if you want to change your port in the **start** command, e.g. if 5002 is being used by other site:\n - 1. change it in the start command above\n - 2. also change it in the `vite.config.ts` file\n\n- push your frontend to a repository on GitHub\n- SSH into your Hetzner account\n- go to your web projects directory, e.g.\n - e.g. `/var/www`\n- clone your repository there\n - e.g. `git clone git@github.com:edwardtanguay/merncrudmulti-frontend.git`\n- navigate into your frontend project directory\n - e.g. `cd merncrudmulti-frontend`\n- create a `.env` file with the URL of the backend that you just set up\n\n ``` text\n VITE_BACKEND_URL = https://merncrudmulti-backend.tanguay.eu\n ```\n\n- set up the site in pm2\n - `npm run setup`\n- deploy your site\n - `npm run deploy`\n- test that your application is running\n - in your firewall, add incoming rule for port 3211\n - in your browser, go to e.g. `http://tanguay.eu:3211` (not https)\n - you should see your frontend running in the browser\n - in your firewall, remove the rule again\n- set up a subdomain for your site, e.g. `merncrudmulti.tanguay.eu` (without `-frontend`)\n- create nginx config file for your frontend site\n - e.g. `/etc/nginx/conf.d/merncrudmulti-frontend.conf`\n\n ``` text\n server {\n server_name merncrudmulti.tanguay.eu;\n location / {\n proxy_pass http://tanguay.eu:3211;\n }\n }\n ```\n\n- register the https certificate for this subdomain\n - `sudo certbot --nginx`\n - choose the number of your site\n- restart the nginx server\n - `sudo systemctl restart nginx`\n- in your browser, go to your site at e.g. [https://merncrudmulti.tanguay.eu](https://merncrudmulti.tanguay.eu)\n","demoUrl":"","updowngradeList":"switch to admin login only|mernMongooseBookCrudFullstack","learningMaterialList":"","todoList":"","externalForkList":"replace session/cookies with JWT - backend|https://github.com/edwardtanguay/jwt224-backend; replace session/cookies with JWT - frontend|https://github.com/edwardtanguay/jwt224-frontend","hasAnimation":true,"imageUrl":"http://starters-backend.tanguay.eu/images/starters/fullstackMernCrudWithMultipleUsersAndSessions.png","isFullStack":true,"readmeText":"# Fullstack MERN site which allows multiple users to add/edit/delete items via CRUD API using MongoDB and TypeScript/ES6-Modules on frontend/backend\n\nThis starter is a base fullstack MERN site that allows you to have multiple users who can log into the site and see different pages (using React Router) and accomplish different tasks (e.g. admins can delete, edit and addd items). The backend is an API built on Node/Express saving data to a MongoDB database using Mongoose. ES6 modules and TypeScript are used on both backend and frontend (a React site created with Vite). Passwords are saved as hashes in the database with bcrypt. The app is simplified for learning purposes but is ready to use as a basis for any site that needs to have multiple users log in, view various data, and change data.\n\n\n\n## features\n\n- **frontend:** \n\t- Vite/React\n\t- Sass\n\t- TypeScript / ES6 modules\n\t- React Router\n\t- useContext\n\t- multiuser login with password\n\t- react-helmet\n\t- axios \n - lodash (cloneDeep)\n\n- **backend:** \n\t- Node/Express \n\t- TypeScript / ES6 modules\n\t- simple MVC structure (`server.ts`/`model.ts`)\n\t- cookie/session authentication\n\t- MongoDB (local or Atlas)\n\t- Mongoose\n\t- bcrypt for hasing passwords\n - CLI command to create bcrypt hashes\n - authorization pattern: accessGroups with anonymousUser\n\n## CREATE ONE PROJECT FOR BOTH BACKEND AND FRONTEND\n\n- open your terminal and go to your project directory\n- create a directory for this project, e.g.\n - `mkdir merncrudmulti`\n\n## INSTALL BACKEND\n\n### set up directory and editor for backend\n\n- enter your project directory\n - `cd merncrudmulti`\n- create backend directory\n - `git clone git@github.com:edwardtanguay/merncrud051-backend.git merncrudmulti-backend`\n- open VSCode in the backend directory\n - `code merncrudmulti-backend`\n- open VSCode terminal\n- install node_modules\n - `npm i`\n- delete old and create new Git repository\n - `rm -rf .git`\n - `git init -b main`\n - make initial commit\n- to distinguish your backend VSCode from your frontend VSCode, set the frame color\n - you need the [VSCode Peacock extension](https://marketplace.visualstudio.com/items?itemName=johnpapa.vscode-peacock)\n - **F1**\n - \"Peacock: Enter a Color\"\n - `navy` (**b**lue for **b**ackend)\n\n### create database\n\n- in your MongoDB Atlas cluster, create a MongoDB database with the name of your project, e.g. `merncrudmulti`\n- create a collection in it called `books`\n- with MongoDB Compass, import the file `dev/books.json` into the collection `books`\n- create a collection in it called `users`\n- with MongoDB Compass, import the file `dev/users.json` into the collection `users`\n\n### create .env file for backend\n\n- create a `.env` file in the root directory of your project and copy in the following content\n\n ``` text\n APP_NAME = Book Site API\n SECONDS_TILL_SESSION_TIMEOUT = 3600\n PORT = 3210\n MONGODB_CONNECTION = mongodb://localhost:27017/merncrudmulti\n SESSION_SECRET = 8234skdfj2834\n FRONTEND_URL = http://localhost:3211\n NODE_ENVIRONMENT = development\n ```\n\n- you can also change the backend/frontend ports if you need to, e.g. to avoid conflicts\n\n\n### start and test the backend\n\n- `npm run dev`\n- click on URL shown in the terminal (e.g. http://localhost:3210)\n- click on `/books` link\n- change data in your MongoDB database to see that the changes are reflected in the browser\n- to test individual routes, see the `test.rest` file (you need the VSCode extension [Rest Client](https://marketplace.visualstudio.com/items?itemName=humao.rest-client))\n\n## INSTALL FRONTEND\n\n### set up directory and editor for frontend\n\n- enter your project directory\n - `cd merncrudmulti`\n- create frontend directory\n - `git clone git@github.com:edwardtanguay/merncrud051-frontend.git merncrudmulti-frontend`\n- open VSCode in the frontend directory\n - `code merncrudmulti-frontend`\n- open VSCode terminal\n- install node_modules\n - `npm i`\n- delete old and create new Git repository\n - `rm -rf .git`\n - `git init -b main`\n - make initial commit\n- to distinguish your frontend VSCode from your backend VSCode, set the frame color\n - you need the [VSCode Peacock extension](https://marketplace.visualstudio.com/items?itemName=johnpapa.vscode-peacock)\n - **F1**\n - \"Peacock: Enter a Color\"\n - `purple` (**f**uchsia for **f**rontend)\n\n### create .env file for frontend\n\n- create an `.env` file in the root directory of your project\n- copy in the following content and change backend port if necessary\n\n ``` text\n VITE_BACKEND_URL = http://localhost:3210\n ```\n \n### start the frontend\n\n- `npm run dev`\n- open in browser\n- click url in terminal\n\n## DEPLOY BACKEND TO LINUX CLOUD SERVER AT HETZNER\n\n- in your npm scripts, change all references of `merncrudmulti` to your site name\n\n ``` text\n \"scripts\": {\n \"dev\": \"nodemon\",\n \"build\": \"tsc\",\n \"setup\": \"pm2 start --name merncrudmulti-backend npm -- start\",\n \"start\": \"node dist/server.js\",\n \"deploy\": \"git pull --no-rebase && npm i && npm run build && pm2 restart merncrudmulti-backend --update-env --time && pm2 save\"\n },\n ```\n\n- push your backend to a repository on GitHub\n- SSH into your Hetzner account\n- go to your web projects directory, e.g.\n - e.g. `/var/www`\n- clone your repository there\n - e.g. `git clone git@github.com:edwardtanguay/merncrudmulti-backend.git`\n- navigate into your backend project directory\n - e.g. `cd merncrudmulti-backend`\n- set up `.env` file\n - replace all capitalized variables with appropriate data\n - USERNAME\n - PASSWORD\n\t- CLUSTERNAME\n - DATABASENAME\n - RANDOMSTRING\n - change the FRONTEND_URL appropriately\n\n ``` text\n APP_NAME = Book Site API\n SECONDS_TILL_SESSION_TIMEOUT = 3600 \n PORT = 3210\n MONGODB_CONNECTION = mongodb+srv://USERNAME:PASSWORD@cluster0.CLUSTERNAME.mongodb.net/DATABASENAME?retryWrites=true&w=majority\n SESSION_SECRET = RANDOMSTRING\n FRONTEND_URL = https://merncrudmulti.tanguay.eu\n NODE_ENVIRONMENT = production\n ```\n\n- set up the site in pm2\n - `npm run setup`\n- deploy your site\n - `npm run deploy`\n- test that your application is running\n - in your firewall, add incoming rule for port 3210\n - in your browser, go to e.g. `http://tanguay.eu:3210` (not https)\n - you should see your backend running in the browser\n - in your firewall, remove the rule again\n- set up a subdomain for your site, e.g. `merncrudmulti-backend.tanguay.eu`\n- create nginx config file for your backend site\n - e.g. `/etc/nginx/conf.d/merncrudmulti-backend.conf`\n\n ``` text\n server {\n server_name merncrudmulti-backend.tanguay.eu;\n location / {\n proxy_pass http://tanguay.eu:3210;\n }\n }\n ```\n\n- register the https certificate for this subdomain\n - `sudo certbot --nginx`\n - choose the number of your site\n- restart the nginx server\n - `sudo systemctl restart nginx`\n- in your browser, go to your site at e.g. [https://merncrudmulti-backend.tanguay.eu](https://merncrudmulti-backend.tanguay.eu)\n\n## DEPLOY FRONTEND TO LINUX CLOUD SERVER AT HETZNER\n\n- in your npm scripts, change all references of `merncrudmulti` to your site name\n\n ``` text\n \"scripts\": {\n \"dev\": \"vite\",\n \"build\": \"tsc && vite build\",\n \"preview\": \"vite preview\",\n \"cp\": \"node cli/cp.mjs\",\n \"setup\": \"pm2 start --name merncrudmulti-frontend npm -- start\",\n \"start\": \"vite preview --host --port 3211\",\n \"deploy\": \"git pull --no-rebase && npm i && npm run build && pm2 restart merncrudmulti-frontend --update-env --time && pm2 save\"\n },\n ```\n \n- note: if you want to change your port in the **start** command, e.g. if 5002 is being used by other site:\n - 1. change it in the start command above\n - 2. also change it in the `vite.config.ts` file\n\n- push your frontend to a repository on GitHub\n- SSH into your Hetzner account\n- go to your web projects directory, e.g.\n - e.g. `/var/www`\n- clone your repository there\n - e.g. `git clone git@github.com:edwardtanguay/merncrudmulti-frontend.git`\n- navigate into your frontend project directory\n - e.g. `cd merncrudmulti-frontend`\n- create a `.env` file with the URL of the backend that you just set up\n\n ``` text\n VITE_BACKEND_URL = https://merncrudmulti-backend.tanguay.eu\n ```\n\n- set up the site in pm2\n - `npm run setup`\n- deploy your site\n - `npm run deploy`\n- test that your application is running\n - in your firewall, add incoming rule for port 3211\n - in your browser, go to e.g. `http://tanguay.eu:3211` (not https)\n - you should see your frontend running in the browser\n - in your firewall, remove the rule again\n- set up a subdomain for your site, e.g. `merncrudmulti.tanguay.eu` (without `-frontend`)\n- create nginx config file for your frontend site\n - e.g. `/etc/nginx/conf.d/merncrudmulti-frontend.conf`\n\n ``` text\n server {\n server_name merncrudmulti.tanguay.eu;\n location / {\n proxy_pass http://tanguay.eu:3211;\n }\n }\n ```\n\n- register the https certificate for this subdomain\n - `sudo certbot --nginx`\n - choose the number of your site\n- restart the nginx server\n - `sudo systemctl restart nginx`\n- in your browser, go to your site at e.g. [https://merncrudmulti.tanguay.eu](https://merncrudmulti.tanguay.eu)\n\n\n## more starters, templates and frameworks\n\nhttps://starters.tanguay.eu","updowngradeItems":[{"text":"switch to admin login only","idCode":"mernMongooseBookCrudFullstack"}],"learningMaterialItems":[],"todoItems":[],"externalForkItems":[{"title":"replace session/cookies with JWT - backend","url":"https://github.com/edwardtanguay/jwt224-backend"},{"title":"replace session/cookies with JWT - frontend","url":"https://github.com/edwardtanguay/jwt224-frontend"}]},{"id":13,"idCode":"nextJsMenuTypeScriptUsecontextTailwind","title":"Next.js Site with Menu and useContext","description":"This is a simple Next.js site that has Typescript, Sass and Tailwind installed. It uses the new Next.js 13 app folder and so the files and folders in the app folder are automatically URL routes, i.e. no need for React Router. It also has useContext implemented with an example of loading both static and API data in useContext and using these state variables on two separate pages. It has an image that is loaded from `public/images` and has a custom 404 page. I deployed it at both Vercel and Netlify choosing all default choices, and was able to set it up as [a site running on Hetzner](https://et001-nextjs-usecontext.tanguay.eu) with Nginx and pm2.","featureMarkdown":"- built with **create-next-app**\n- uses the new **Next.js 13 app folder** and so has automatic URL routing\n- **TypeScript** and **ES6 modules**\n- a mixture of **Tailwind** and **Sass**, they work nicely together, for each styling task you can choose whichever you want\n- custom 404 page\n- **useContext** is implemented\n- uses Next.js's server-side-rendering and so has **good SEO** and you can make **custom social-media previews** with title, description and image for each page\n- fetches data from an **external API via axios**\n- **displays image** which is located in the `public/images` directory and accessed with the ![]() tag\n- deploys at **Vercel** and **Netlify** by default","githubUrl":"https://github.com/edwardtanguay/et001-nextjs-usecontext","githubUrl2":"","installMarkdown":"## install\n\n- go to your projects directory\n - e.g. `cd ~/projects`\n- in your projects directory, create your new site e.g. **site001** by cloning this project \n - `git clone git@github.com:edwardtanguay/et001-nextjs-usecontext.git site001`\n- open your newly created site in VSCode\n - `code site001`\n- inside VSCode, open the VSCode terminal\n - **CTRL-`**\n- delete the connection to this repository by deleting the Git repository\n - `rm -rf .git`\n- create a new local Git repository\n - `git init -b main`\n- install node_modules\n - `npm i`\n- start your site and click given link to view website\n - `npm run dev`","demoUrl":"https://et001-nextjs-usecontext.vercel.app","updowngradeList":"replace Next.js with Vite React|blankViteDarkMenuUsecontext","learningMaterialList":"HOWTO: Create a Next.js site with menu, useContext, TypeScript, Tailwind, API-fetching, and social-media preview links|https://edwardtanguay.vercel.app/howtos?id=688","todoList":"","externalForkList":"","hasAnimation":true,"imageUrl":"http://starters-backend.tanguay.eu/images/starters/nextJsMenuTypeScriptUsecontextTailwind.png","isFullStack":false,"readmeText":"# Next.js Site with Menu and useContext\n\nThis is a simple Next.js site that has Typescript, Sass and Tailwind installed. It uses the new Next.js 13 app folder and so the files and folders in the app folder are automatically URL routes, i.e. no need for React Router. It also has useContext implemented with an example of loading both static and API data in useContext and using these state variables on two separate pages. It has an image that is loaded from `public/images` and has a custom 404 page. I deployed it at both Vercel and Netlify choosing all default choices, and was able to set it up as [a site running on Hetzner](https://et001-nextjs-usecontext.tanguay.eu) with Nginx and pm2.\n\n\n\n## features\n\n- built with **create-next-app**\n- uses the new **Next.js 13 app folder** and so has automatic URL routing\n- **TypeScript** and **ES6 modules**\n- a mixture of **Tailwind** and **Sass**, they work nicely together, for each styling task you can choose whichever you want\n- custom 404 page\n- **useContext** is implemented\n- uses Next.js's server-side-rendering and so has **good SEO** and you can make **custom social-media previews** with title, description and image for each page\n- fetches data from an **external API via axios**\n- **displays image** which is located in the `public/images` directory and accessed with the
tag\n- deploys at **Vercel** and **Netlify** by default","githubUrl":"https://github.com/edwardtanguay/et001-nextjs-usecontext","githubUrl2":"","installMarkdown":"## install\n\n- go to your projects directory\n - e.g. `cd ~/projects`\n- in your projects directory, create your new site e.g. **site001** by cloning this project \n - `git clone git@github.com:edwardtanguay/et001-nextjs-usecontext.git site001`\n- open your newly created site in VSCode\n - `code site001`\n- inside VSCode, open the VSCode terminal\n - **CTRL-`**\n- delete the connection to this repository by deleting the Git repository\n - `rm -rf .git`\n- create a new local Git repository\n - `git init -b main`\n- install node_modules\n - `npm i`\n- start your site and click given link to view website\n - `npm run dev`","demoUrl":"https://et001-nextjs-usecontext.vercel.app","updowngradeList":"replace Next.js with Vite React|blankViteDarkMenuUsecontext","learningMaterialList":"HOWTO: Create a Next.js site with menu, useContext, TypeScript, Tailwind, API-fetching, and social-media preview links|https://edwardtanguay.vercel.app/howtos?id=688","todoList":"","externalForkList":"","hasAnimation":true,"imageUrl":"http://starters-backend.tanguay.eu/images/starters/nextJsMenuTypeScriptUsecontextTailwind.png","isFullStack":false,"readmeText":"# Next.js Site with Menu and useContext\n\nThis is a simple Next.js site that has Typescript, Sass and Tailwind installed. It uses the new Next.js 13 app folder and so the files and folders in the app folder are automatically URL routes, i.e. no need for React Router. It also has useContext implemented with an example of loading both static and API data in useContext and using these state variables on two separate pages. It has an image that is loaded from `public/images` and has a custom 404 page. I deployed it at both Vercel and Netlify choosing all default choices, and was able to set it up as [a site running on Hetzner](https://et001-nextjs-usecontext.tanguay.eu) with Nginx and pm2.\n\n\n\n## features\n\n- built with **create-next-app**\n- uses the new **Next.js 13 app folder** and so has automatic URL routing\n- **TypeScript** and **ES6 modules**\n- a mixture of **Tailwind** and **Sass**, they work nicely together, for each styling task you can choose whichever you want\n- custom 404 page\n- **useContext** is implemented\n- uses Next.js's server-side-rendering and so has **good SEO** and you can make **custom social-media previews** with title, description and image for each page\n- fetches data from an **external API via axios**\n- **displays image** which is located in the `public/images` directory and accessed with the ![]() tag\n- deploys at **Vercel** and **Netlify** by default\n\n## install\n\n- go to your projects directory\n - e.g. `cd ~/projects`\n- in your projects directory, create your new site e.g. **site001** by cloning this project \n - `git clone git@github.com:edwardtanguay/et001-nextjs-usecontext.git site001`\n- open your newly created site in VSCode\n - `code site001`\n- inside VSCode, open the VSCode terminal\n - **CTRL-`**\n- delete the connection to this repository by deleting the Git repository\n - `rm -rf .git`\n- create a new local Git repository\n - `git init -b main`\n- install node_modules\n - `npm i`\n- start your site and click given link to view website\n - `npm run dev`\n\n## more starters, templates and frameworks\n\nhttps://starters.tanguay.eu","updowngradeItems":[{"text":"replace Next.js with Vite React","idCode":"blankViteDarkMenuUsecontext"}],"learningMaterialItems":[{"title":"HOWTO: Create a Next.js site with menu, useContext, TypeScript, Tailwind, API-fetching, and social-media preview links","url":"https://edwardtanguay.vercel.app/howtos?id=688"}],"todoItems":[],"externalForkItems":[]},{"id":14,"idCode":"startersimplefrontbackmongo","title":"MERN frontend/backend with creation script to create MongoDB database and collections","description":"This is a Vite React site with TypeScript/ES6-modules on the frontend, and a Node/Express API with TypeScript/ES6 modules on the backend which serves jobs and skills for the frontend to display. You can execute the script `npm run createdb` to create the MongoDB database (either local or at e.g. MongoDB Atlas) and fill the two database collections **jobs** and **skills** with data from two local .json files. I created this as a test full-stack app to convert to a Docker application, so it is very simple but has all the parts of a full-stack application (frontend, backend, database). Therefore, it might also be helpful as a template to get started with a full-stack MERN application.","featureMarkdown":"- **frontend:** \n\t- Vite/React \n\t- Sass\n\t- TypeScript\n\t- ES6 modules\n\t- React Router\n\t- useContext\n- **backend:** \n\t- Node/Express \n\t- TypeScript \n\t- ES6 modules\n\t- simple MVC structure (`server.ts`/`model.ts`)\n\t- MongoDB database (local or e.g. MongoDB Atlas)\n\t- npm script to create database and fill with data (`npm run createdb`)","githubUrl":"https://github.com/edwardtanguay/starter-simple-frontbackmongo-frontend","githubUrl2":"https://github.com/edwardtanguay/starter-simple-frontbackmongo-backend","installMarkdown":"## CREATE ONE PROJECT FOR BOTH BACKEND AND FRONTEND\n\n- open your terminal and go to your project directory\n- create a directory for this project, e.g.\n - `mkdir mernfullstackapp`\n\n## INSTALL BACKEND\n\n### set up directory and editor for backend\n\n- enter your project directory\n - `cd mernfullstackapp`\n- create backend directory\n - `git clone git@github.com:edwardtanguay/starter-simple-frontbackmongo-backend.git mernfullstackapp-backend`\n- open VSCode in the backend directory\n - `code mernfullstackapp-backend`\n- open VSCode terminal\n- install node_modules\n - `npm i`\n- delete old and create new Git repository\n - `rm -rf .git`\n - `git init -b main`\n - make initial commit\n- to distinguish your backend VSCode from your frontend VSCode, set the frame color\n - you need the [VSCode Peacock extension](https://marketplace.visualstudio.com/items?itemName=johnpapa.vscode-peacock)\n - **F1**\n - \"Peacock: Enter a Color\"\n - `navy` (**b**lue for **b**ackend)\n\n### create .env file for backend\n\n- create a `.env` file in the root directory of your project and copy in the following content\n\n ``` text\n\tAPP_NAME = MERN Full-Stack MongoDB App\n\tPORT = 5503\n\tMONGODB_URL = mongodb://localhost:27017\n\tMONGODB_DBNAME = mernfullstackapp\n ```\n\n### create database\n\n- make sure your URL and DBNAME variables are correct in the .env file\n- execute `npm run createdb`\n- if successful, your script will return nothing and your database will exist with two collections\n\n### start and test the backend\n\n- `npm run dev`\n- click on URL shown in the terminal (e.g. http://localhost:5503)\n- click on `/jobs` link\n- change data in your MongoDB database to see that the changes are reflected in the browser\n- you can also test your routes with the `test.rest` file (you need the VSCode extension [Rest Client](https://marketplace.visualstudio.com/items?itemName=humao.rest-client))\n\n## INSTALL FRONTEND\n\n### set up directory and editor for frontend\n\n- enter your project directory\n - `cd mernfullstackapp`\n- create frontend directory\n - `git clone git@github.com:edwardtanguay/starter-simple-frontbackmongo-frontend.git mernfullstackapp-frontend`\n- open VSCode in the frontend directory\n - `code mernfullstackapp-frontend`\n- open VSCode terminal\n- install node_modules\n - `npm i`\n- delete old and create new Git repository\n - `rm -rf .git`\n - `git init -b main`\n - make initial commit\n- to distinguish your frontend VSCode from your backend VSCode, set the frame color\n - you need the [VSCode Peacock extension](https://marketplace.visualstudio.com/items?itemName=johnpapa.vscode-peacock)\n - **F1**\n - \"Peacock: Enter a Color\"\n - `purple` (**f**uchsia for **f**rontend)\n\n### create .env file for frontend\n\n- create an `.env` file in the root directory of your project\n- copy in the following content and change backend port if necessary\n\n ``` text\n VITE_BACKEND_URL = http://localhost:5503\n ```\n \n### start the frontend\n\n- `npm run dev`\n- open in browser\n- click url in terminal","demoUrl":"","updowngradeList":"","learningMaterialList":"","todoList":"","externalForkList":"","hasAnimation":false,"imageUrl":"http://starters-backend.tanguay.eu/images/starters/startersimplefrontbackmongo.png","isFullStack":true,"readmeText":"# MERN frontend/backend with creation script to create MongoDB database and collections\n\nThis is a Vite React site with TypeScript/ES6-modules on the frontend, and a Node/Express API with TypeScript/ES6 modules on the backend which serves jobs and skills for the frontend to display. You can execute the script `npm run createdb` to create the MongoDB database (either local or at e.g. MongoDB Atlas) and fill the two database collections **jobs** and **skills** with data from two local .json files. I created this as a test full-stack app to convert to a Docker application, so it is very simple but has all the parts of a full-stack application (frontend, backend, database). Therefore, it might also be helpful as a template to get started with a full-stack MERN application.\n\n\n\n## features\n\n- **frontend:** \n\t- Vite/React \n\t- Sass\n\t- TypeScript\n\t- ES6 modules\n\t- React Router\n\t- useContext\n- **backend:** \n\t- Node/Express \n\t- TypeScript \n\t- ES6 modules\n\t- simple MVC structure (`server.ts`/`model.ts`)\n\t- MongoDB database (local or e.g. MongoDB Atlas)\n\t- npm script to create database and fill with data (`npm run createdb`)\n\n## CREATE ONE PROJECT FOR BOTH BACKEND AND FRONTEND\n\n- open your terminal and go to your project directory\n- create a directory for this project, e.g.\n - `mkdir mernfullstackapp`\n\n## INSTALL BACKEND\n\n### set up directory and editor for backend\n\n- enter your project directory\n - `cd mernfullstackapp`\n- create backend directory\n - `git clone git@github.com:edwardtanguay/starter-simple-frontbackmongo-backend.git mernfullstackapp-backend`\n- open VSCode in the backend directory\n - `code mernfullstackapp-backend`\n- open VSCode terminal\n- install node_modules\n - `npm i`\n- delete old and create new Git repository\n - `rm -rf .git`\n - `git init -b main`\n - make initial commit\n- to distinguish your backend VSCode from your frontend VSCode, set the frame color\n - you need the [VSCode Peacock extension](https://marketplace.visualstudio.com/items?itemName=johnpapa.vscode-peacock)\n - **F1**\n - \"Peacock: Enter a Color\"\n - `navy` (**b**lue for **b**ackend)\n\n### create .env file for backend\n\n- create a `.env` file in the root directory of your project and copy in the following content\n\n ``` text\n\tAPP_NAME = MERN Full-Stack MongoDB App\n\tPORT = 5503\n\tMONGODB_URL = mongodb://localhost:27017\n\tMONGODB_DBNAME = mernfullstackapp\n ```\n\n### create database\n\n- make sure your URL and DBNAME variables are correct in the .env file\n- execute `npm run createdb`\n- if successful, your script will return nothing and your database will exist with two collections\n\n### start and test the backend\n\n- `npm run dev`\n- click on URL shown in the terminal (e.g. http://localhost:5503)\n- click on `/jobs` link\n- change data in your MongoDB database to see that the changes are reflected in the browser\n- you can also test your routes with the `test.rest` file (you need the VSCode extension [Rest Client](https://marketplace.visualstudio.com/items?itemName=humao.rest-client))\n\n## INSTALL FRONTEND\n\n### set up directory and editor for frontend\n\n- enter your project directory\n - `cd mernfullstackapp`\n- create frontend directory\n - `git clone git@github.com:edwardtanguay/starter-simple-frontbackmongo-frontend.git mernfullstackapp-frontend`\n- open VSCode in the frontend directory\n - `code mernfullstackapp-frontend`\n- open VSCode terminal\n- install node_modules\n - `npm i`\n- delete old and create new Git repository\n - `rm -rf .git`\n - `git init -b main`\n - make initial commit\n- to distinguish your frontend VSCode from your backend VSCode, set the frame color\n - you need the [VSCode Peacock extension](https://marketplace.visualstudio.com/items?itemName=johnpapa.vscode-peacock)\n - **F1**\n - \"Peacock: Enter a Color\"\n - `purple` (**f**uchsia for **f**rontend)\n\n### create .env file for frontend\n\n- create an `.env` file in the root directory of your project\n- copy in the following content and change backend port if necessary\n\n ``` text\n VITE_BACKEND_URL = http://localhost:5503\n ```\n \n### start the frontend\n\n- `npm run dev`\n- open in browser\n- click url in terminal\n\n## more starters, templates and frameworks\n\nhttps://starters.tanguay.eu","updowngradeItems":[],"learningMaterialItems":[],"todoItems":[],"externalForkItems":[]},{"id":15,"idCode":"darkViteVanilla","title":"Simple Vite Vanilla Site","description":"This is a simple one-page HTML/CSS/JavaScript site created with Vite Vanilla option. It has Typescript and Sass already installed.","featureMarkdown":"- built with **Vite** (Vanilla/TypeScript)\n- **one-page** without any menu\n- dark layout\n- TypeScript\n- one **Sass** file\n- *good for developers with HTML/CSS/JavaScript or merely HTML/CSS skills who want to make one-page sites with a modern React-like framework that has npm packages, can load JSON files from the file system, and you can easily publish at Vercel, etc.* ","githubUrl":"https://github.com/edwardtanguay/vite-vanilla-dark","githubUrl2":"","installMarkdown":"## install\n\n- download zip\n- copy all files to new directory, e.g. `/home/yourname/projects/site001`\n- open VSCode in that directory (`code .`)\n- `npm i`\n- `npm run dev`","demoUrl":"","updowngradeList":"add menu|darkViteVanillaMenu","learningMaterialList":"","todoList":"","externalForkList":"","hasAnimation":false,"imageUrl":"http://starters-backend.tanguay.eu/images/starters/darkViteVanilla.png","isFullStack":false,"readmeText":"# Simple Vite Vanilla Site\n\nThis is a simple one-page HTML/CSS/JavaScript site created with Vite Vanilla option. It has Typescript and Sass already installed.\n\n\n\n## features\n\n- built with **Vite** (Vanilla/TypeScript)\n- **one-page** without any menu\n- dark layout\n- TypeScript\n- one **Sass** file\n- *good for developers with HTML/CSS/JavaScript or merely HTML/CSS skills who want to make one-page sites with a modern React-like framework that has npm packages, can load JSON files from the file system, and you can easily publish at Vercel, etc.* \n\n## install\n\n- download zip\n- copy all files to new directory, e.g. `/home/yourname/projects/site001`\n- open VSCode in that directory (`code .`)\n- `npm i`\n- `npm run dev`\n\n## more starters, templates and frameworks\n\nhttps://starters.tanguay.eu","updowngradeItems":[{"text":"add menu","idCode":"darkViteVanillaMenu"}],"learningMaterialItems":[],"todoItems":[],"externalForkItems":[]},{"id":15,"idCode":"darkViteVanillaMenu","title":"Vite Vanilla Site with Menu","description":"This is a multi-page HTML/CSS/JavaScript site created with Vite Vanilla option. It has Typescript and Sass already installed. I created a simple Router which makes it possible to add pages easily (a few changes in `Router.ts` and then add e.g. `pages/PageReports.ts` which looks similar to a React component.","featureMarkdown":"- built with **Vite** (Vanilla/TypeScript)\n- **multi-page** menu, editable in `Router.ts`\n- dark layout\n- TypeScript\n- one **Sass** file\n- *good for developers who don't yet have React skills but who want to make multi-page sites with a modern React-like framework that has npm packages, can load JSON files from the file system, and you can easily publish at Vercel, etc.*","githubUrl":"https://github.com/edwardtanguay/vite-vanilla-menu","githubUrl2":"","installMarkdown":"## install\n\n- download zip\n- copy all files to new directory, e.g. `/home/yourname/projects/site001`\n- open VSCode in that directory (`code .`)\n- `npm i`\n- `npm run dev`","demoUrl":"https://vite-vanilla-menu.vercel.app","updowngradeList":"remove menu|darkViteVanilla","learningMaterialList":"","todoList":"","externalForkList":"","hasAnimation":true,"imageUrl":"http://starters-backend.tanguay.eu/images/starters/darkViteVanillaMenu.png","isFullStack":false,"readmeText":"# Vite Vanilla Site with Menu\n\nThis is a multi-page HTML/CSS/JavaScript site created with Vite Vanilla option. It has Typescript and Sass already installed. I created a simple Router which makes it possible to add pages easily (a few changes in `Router.ts` and then add e.g. `pages/PageReports.ts` which looks similar to a React component.\n\n\n\n## features\n\n- built with **Vite** (Vanilla/TypeScript)\n- **multi-page** menu, editable in `Router.ts`\n- dark layout\n- TypeScript\n- one **Sass** file\n- *good for developers who don't yet have React skills but who want to make multi-page sites with a modern React-like framework that has npm packages, can load JSON files from the file system, and you can easily publish at Vercel, etc.*\n\n## install\n\n- download zip\n- copy all files to new directory, e.g. `/home/yourname/projects/site001`\n- open VSCode in that directory (`code .`)\n- `npm i`\n- `npm run dev`\n\n## more starters, templates and frameworks\n\nhttps://starters.tanguay.eu","updowngradeItems":[{"text":"remove menu","idCode":"darkViteVanilla"}],"learningMaterialItems":[],"todoItems":[],"externalForkItems":[]},{"id":16,"idCode":"viteVanillaTestingBackendFrontendTypeScript","title":"Vite Vanilla site with TypeScript backend and frontend in same folder with CLI and unit testing","description":"This is a multi-page HTML/CSS/JavaScript site created with Vite Vanilla option. In the project there is a backend and a frontent, both written in TypeScript, which can be started with one `npm run dev` command. There is a `share` directory which has functions in TypeScript which both front and backend use. These functions are unit tested with Vitest (basically Jest for TypeScript). There is also a CLI command which can create new example items for the website. This is a good starter project for a local app where all data is produced on the backend and delivers the data to the frontend, and where you can make CLI commands to automate any repetitive tasks. This is also an actual site that I use to create and store HTML/CSS/JavaScript examples for e.g. animations, interactive components, etc. for JavaScript-DOM sites.","featureMarkdown":"- built with **Vite** (Vanilla/TypeScript)\n- **multi-page** menu, editable in `Router.ts`\n- dark layout\n- TypeScript in both backend and frontend\n- start backend and frontend with one command: `npm run dev`\n- frontend uses **Sass**\n- testing with Vitest: `npm run test` and `npm run testcov` (coverage)\n- CLI which runs a script on the backend that creates new components: `npm run ce`","githubUrl":"https://github.com/edwardtanguay/et005-starter-example-showcase","githubUrl2":"","installMarkdown":"## install\n\n- download zip\n- copy all files to new directory, e.g. `/home/yourname/projects/site001`\n- open VSCode in that directory (`code .`)\n- `npm i`\n- `npm run dev`\n\n## testing\n\n- `npm run test` (run all unit tests)\n- `npm run testcov` (show test coverage)\n\n## CLI\n\n- `npm run ce`","demoUrl":"https://et005-starter-example-showcase.vercel.app","updowngradeList":"","learningMaterialList":"","todoList":"","externalForkList":"","hasAnimation":true,"imageUrl":"http://starters-backend.tanguay.eu/images/starters/viteVanillaTestingBackendFrontendTypeScript.png","isFullStack":false,"readmeText":"# Vite Vanilla site with TypeScript backend and frontend in same folder with CLI and unit testing\n\nThis is a multi-page HTML/CSS/JavaScript site created with Vite Vanilla option. In the project there is a backend and a frontent, both written in TypeScript, which can be started with one `npm run dev` command. There is a `share` directory which has functions in TypeScript which both front and backend use. These functions are unit tested with Vitest (basically Jest for TypeScript). There is also a CLI command which can create new example items for the website. This is a good starter project for a local app where all data is produced on the backend and delivers the data to the frontend, and where you can make CLI commands to automate any repetitive tasks. This is also an actual site that I use to create and store HTML/CSS/JavaScript examples for e.g. animations, interactive components, etc. for JavaScript-DOM sites.\n\n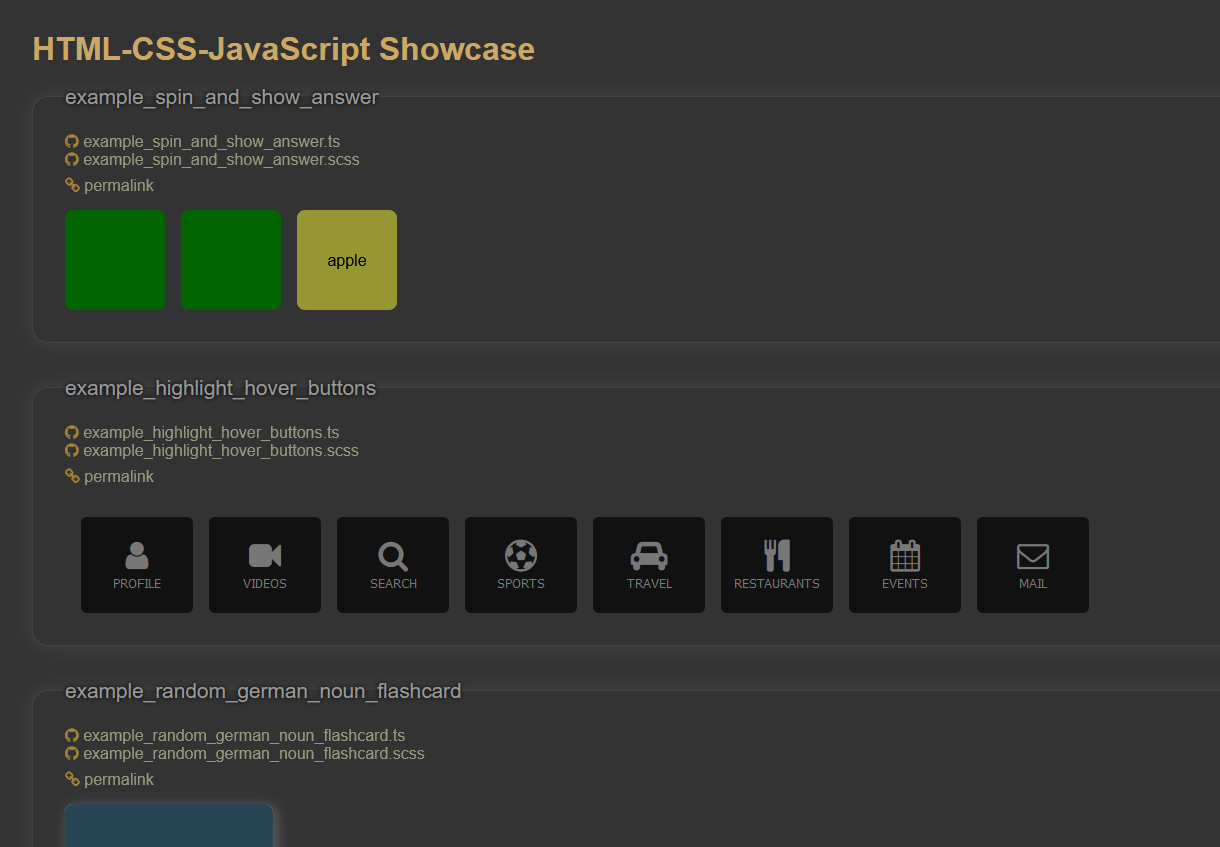\n\n## features\n\n- built with **Vite** (Vanilla/TypeScript)\n- **multi-page** menu, editable in `Router.ts`\n- dark layout\n- TypeScript in both backend and frontend\n- start backend and frontend with one command: `npm run dev`\n- frontend uses **Sass**\n- testing with Vitest: `npm run test` and `npm run testcov` (coverage)\n- CLI which runs a script on the backend that creates new components: `npm run ce`\n\n## install\n\n- download zip\n- copy all files to new directory, e.g. `/home/yourname/projects/site001`\n- open VSCode in that directory (`code .`)\n- `npm i`\n- `npm run dev`\n\n## testing\n\n- `npm run test` (run all unit tests)\n- `npm run testcov` (show test coverage)\n\n## CLI\n\n- `npm run ce`\n\n## more starters, templates and frameworks\n\nhttps://starters.tanguay.eu","updowngradeItems":[],"learningMaterialItems":[],"todoItems":[],"externalForkItems":[]}]
tag\n- deploys at **Vercel** and **Netlify** by default\n\n## install\n\n- go to your projects directory\n - e.g. `cd ~/projects`\n- in your projects directory, create your new site e.g. **site001** by cloning this project \n - `git clone git@github.com:edwardtanguay/et001-nextjs-usecontext.git site001`\n- open your newly created site in VSCode\n - `code site001`\n- inside VSCode, open the VSCode terminal\n - **CTRL-`**\n- delete the connection to this repository by deleting the Git repository\n - `rm -rf .git`\n- create a new local Git repository\n - `git init -b main`\n- install node_modules\n - `npm i`\n- start your site and click given link to view website\n - `npm run dev`\n\n## more starters, templates and frameworks\n\nhttps://starters.tanguay.eu","updowngradeItems":[{"text":"replace Next.js with Vite React","idCode":"blankViteDarkMenuUsecontext"}],"learningMaterialItems":[{"title":"HOWTO: Create a Next.js site with menu, useContext, TypeScript, Tailwind, API-fetching, and social-media preview links","url":"https://edwardtanguay.vercel.app/howtos?id=688"}],"todoItems":[],"externalForkItems":[]},{"id":14,"idCode":"startersimplefrontbackmongo","title":"MERN frontend/backend with creation script to create MongoDB database and collections","description":"This is a Vite React site with TypeScript/ES6-modules on the frontend, and a Node/Express API with TypeScript/ES6 modules on the backend which serves jobs and skills for the frontend to display. You can execute the script `npm run createdb` to create the MongoDB database (either local or at e.g. MongoDB Atlas) and fill the two database collections **jobs** and **skills** with data from two local .json files. I created this as a test full-stack app to convert to a Docker application, so it is very simple but has all the parts of a full-stack application (frontend, backend, database). Therefore, it might also be helpful as a template to get started with a full-stack MERN application.","featureMarkdown":"- **frontend:** \n\t- Vite/React \n\t- Sass\n\t- TypeScript\n\t- ES6 modules\n\t- React Router\n\t- useContext\n- **backend:** \n\t- Node/Express \n\t- TypeScript \n\t- ES6 modules\n\t- simple MVC structure (`server.ts`/`model.ts`)\n\t- MongoDB database (local or e.g. MongoDB Atlas)\n\t- npm script to create database and fill with data (`npm run createdb`)","githubUrl":"https://github.com/edwardtanguay/starter-simple-frontbackmongo-frontend","githubUrl2":"https://github.com/edwardtanguay/starter-simple-frontbackmongo-backend","installMarkdown":"## CREATE ONE PROJECT FOR BOTH BACKEND AND FRONTEND\n\n- open your terminal and go to your project directory\n- create a directory for this project, e.g.\n - `mkdir mernfullstackapp`\n\n## INSTALL BACKEND\n\n### set up directory and editor for backend\n\n- enter your project directory\n - `cd mernfullstackapp`\n- create backend directory\n - `git clone git@github.com:edwardtanguay/starter-simple-frontbackmongo-backend.git mernfullstackapp-backend`\n- open VSCode in the backend directory\n - `code mernfullstackapp-backend`\n- open VSCode terminal\n- install node_modules\n - `npm i`\n- delete old and create new Git repository\n - `rm -rf .git`\n - `git init -b main`\n - make initial commit\n- to distinguish your backend VSCode from your frontend VSCode, set the frame color\n - you need the [VSCode Peacock extension](https://marketplace.visualstudio.com/items?itemName=johnpapa.vscode-peacock)\n - **F1**\n - \"Peacock: Enter a Color\"\n - `navy` (**b**lue for **b**ackend)\n\n### create .env file for backend\n\n- create a `.env` file in the root directory of your project and copy in the following content\n\n ``` text\n\tAPP_NAME = MERN Full-Stack MongoDB App\n\tPORT = 5503\n\tMONGODB_URL = mongodb://localhost:27017\n\tMONGODB_DBNAME = mernfullstackapp\n ```\n\n### create database\n\n- make sure your URL and DBNAME variables are correct in the .env file\n- execute `npm run createdb`\n- if successful, your script will return nothing and your database will exist with two collections\n\n### start and test the backend\n\n- `npm run dev`\n- click on URL shown in the terminal (e.g. http://localhost:5503)\n- click on `/jobs` link\n- change data in your MongoDB database to see that the changes are reflected in the browser\n- you can also test your routes with the `test.rest` file (you need the VSCode extension [Rest Client](https://marketplace.visualstudio.com/items?itemName=humao.rest-client))\n\n## INSTALL FRONTEND\n\n### set up directory and editor for frontend\n\n- enter your project directory\n - `cd mernfullstackapp`\n- create frontend directory\n - `git clone git@github.com:edwardtanguay/starter-simple-frontbackmongo-frontend.git mernfullstackapp-frontend`\n- open VSCode in the frontend directory\n - `code mernfullstackapp-frontend`\n- open VSCode terminal\n- install node_modules\n - `npm i`\n- delete old and create new Git repository\n - `rm -rf .git`\n - `git init -b main`\n - make initial commit\n- to distinguish your frontend VSCode from your backend VSCode, set the frame color\n - you need the [VSCode Peacock extension](https://marketplace.visualstudio.com/items?itemName=johnpapa.vscode-peacock)\n - **F1**\n - \"Peacock: Enter a Color\"\n - `purple` (**f**uchsia for **f**rontend)\n\n### create .env file for frontend\n\n- create an `.env` file in the root directory of your project\n- copy in the following content and change backend port if necessary\n\n ``` text\n VITE_BACKEND_URL = http://localhost:5503\n ```\n \n### start the frontend\n\n- `npm run dev`\n- open in browser\n- click url in terminal","demoUrl":"","updowngradeList":"","learningMaterialList":"","todoList":"","externalForkList":"","hasAnimation":false,"imageUrl":"http://starters-backend.tanguay.eu/images/starters/startersimplefrontbackmongo.png","isFullStack":true,"readmeText":"# MERN frontend/backend with creation script to create MongoDB database and collections\n\nThis is a Vite React site with TypeScript/ES6-modules on the frontend, and a Node/Express API with TypeScript/ES6 modules on the backend which serves jobs and skills for the frontend to display. You can execute the script `npm run createdb` to create the MongoDB database (either local or at e.g. MongoDB Atlas) and fill the two database collections **jobs** and **skills** with data from two local .json files. I created this as a test full-stack app to convert to a Docker application, so it is very simple but has all the parts of a full-stack application (frontend, backend, database). Therefore, it might also be helpful as a template to get started with a full-stack MERN application.\n\n\n\n## features\n\n- **frontend:** \n\t- Vite/React \n\t- Sass\n\t- TypeScript\n\t- ES6 modules\n\t- React Router\n\t- useContext\n- **backend:** \n\t- Node/Express \n\t- TypeScript \n\t- ES6 modules\n\t- simple MVC structure (`server.ts`/`model.ts`)\n\t- MongoDB database (local or e.g. MongoDB Atlas)\n\t- npm script to create database and fill with data (`npm run createdb`)\n\n## CREATE ONE PROJECT FOR BOTH BACKEND AND FRONTEND\n\n- open your terminal and go to your project directory\n- create a directory for this project, e.g.\n - `mkdir mernfullstackapp`\n\n## INSTALL BACKEND\n\n### set up directory and editor for backend\n\n- enter your project directory\n - `cd mernfullstackapp`\n- create backend directory\n - `git clone git@github.com:edwardtanguay/starter-simple-frontbackmongo-backend.git mernfullstackapp-backend`\n- open VSCode in the backend directory\n - `code mernfullstackapp-backend`\n- open VSCode terminal\n- install node_modules\n - `npm i`\n- delete old and create new Git repository\n - `rm -rf .git`\n - `git init -b main`\n - make initial commit\n- to distinguish your backend VSCode from your frontend VSCode, set the frame color\n - you need the [VSCode Peacock extension](https://marketplace.visualstudio.com/items?itemName=johnpapa.vscode-peacock)\n - **F1**\n - \"Peacock: Enter a Color\"\n - `navy` (**b**lue for **b**ackend)\n\n### create .env file for backend\n\n- create a `.env` file in the root directory of your project and copy in the following content\n\n ``` text\n\tAPP_NAME = MERN Full-Stack MongoDB App\n\tPORT = 5503\n\tMONGODB_URL = mongodb://localhost:27017\n\tMONGODB_DBNAME = mernfullstackapp\n ```\n\n### create database\n\n- make sure your URL and DBNAME variables are correct in the .env file\n- execute `npm run createdb`\n- if successful, your script will return nothing and your database will exist with two collections\n\n### start and test the backend\n\n- `npm run dev`\n- click on URL shown in the terminal (e.g. http://localhost:5503)\n- click on `/jobs` link\n- change data in your MongoDB database to see that the changes are reflected in the browser\n- you can also test your routes with the `test.rest` file (you need the VSCode extension [Rest Client](https://marketplace.visualstudio.com/items?itemName=humao.rest-client))\n\n## INSTALL FRONTEND\n\n### set up directory and editor for frontend\n\n- enter your project directory\n - `cd mernfullstackapp`\n- create frontend directory\n - `git clone git@github.com:edwardtanguay/starter-simple-frontbackmongo-frontend.git mernfullstackapp-frontend`\n- open VSCode in the frontend directory\n - `code mernfullstackapp-frontend`\n- open VSCode terminal\n- install node_modules\n - `npm i`\n- delete old and create new Git repository\n - `rm -rf .git`\n - `git init -b main`\n - make initial commit\n- to distinguish your frontend VSCode from your backend VSCode, set the frame color\n - you need the [VSCode Peacock extension](https://marketplace.visualstudio.com/items?itemName=johnpapa.vscode-peacock)\n - **F1**\n - \"Peacock: Enter a Color\"\n - `purple` (**f**uchsia for **f**rontend)\n\n### create .env file for frontend\n\n- create an `.env` file in the root directory of your project\n- copy in the following content and change backend port if necessary\n\n ``` text\n VITE_BACKEND_URL = http://localhost:5503\n ```\n \n### start the frontend\n\n- `npm run dev`\n- open in browser\n- click url in terminal\n\n## more starters, templates and frameworks\n\nhttps://starters.tanguay.eu","updowngradeItems":[],"learningMaterialItems":[],"todoItems":[],"externalForkItems":[]},{"id":15,"idCode":"darkViteVanilla","title":"Simple Vite Vanilla Site","description":"This is a simple one-page HTML/CSS/JavaScript site created with Vite Vanilla option. It has Typescript and Sass already installed.","featureMarkdown":"- built with **Vite** (Vanilla/TypeScript)\n- **one-page** without any menu\n- dark layout\n- TypeScript\n- one **Sass** file\n- *good for developers with HTML/CSS/JavaScript or merely HTML/CSS skills who want to make one-page sites with a modern React-like framework that has npm packages, can load JSON files from the file system, and you can easily publish at Vercel, etc.* ","githubUrl":"https://github.com/edwardtanguay/vite-vanilla-dark","githubUrl2":"","installMarkdown":"## install\n\n- download zip\n- copy all files to new directory, e.g. `/home/yourname/projects/site001`\n- open VSCode in that directory (`code .`)\n- `npm i`\n- `npm run dev`","demoUrl":"","updowngradeList":"add menu|darkViteVanillaMenu","learningMaterialList":"","todoList":"","externalForkList":"","hasAnimation":false,"imageUrl":"http://starters-backend.tanguay.eu/images/starters/darkViteVanilla.png","isFullStack":false,"readmeText":"# Simple Vite Vanilla Site\n\nThis is a simple one-page HTML/CSS/JavaScript site created with Vite Vanilla option. It has Typescript and Sass already installed.\n\n\n\n## features\n\n- built with **Vite** (Vanilla/TypeScript)\n- **one-page** without any menu\n- dark layout\n- TypeScript\n- one **Sass** file\n- *good for developers with HTML/CSS/JavaScript or merely HTML/CSS skills who want to make one-page sites with a modern React-like framework that has npm packages, can load JSON files from the file system, and you can easily publish at Vercel, etc.* \n\n## install\n\n- download zip\n- copy all files to new directory, e.g. `/home/yourname/projects/site001`\n- open VSCode in that directory (`code .`)\n- `npm i`\n- `npm run dev`\n\n## more starters, templates and frameworks\n\nhttps://starters.tanguay.eu","updowngradeItems":[{"text":"add menu","idCode":"darkViteVanillaMenu"}],"learningMaterialItems":[],"todoItems":[],"externalForkItems":[]},{"id":15,"idCode":"darkViteVanillaMenu","title":"Vite Vanilla Site with Menu","description":"This is a multi-page HTML/CSS/JavaScript site created with Vite Vanilla option. It has Typescript and Sass already installed. I created a simple Router which makes it possible to add pages easily (a few changes in `Router.ts` and then add e.g. `pages/PageReports.ts` which looks similar to a React component.","featureMarkdown":"- built with **Vite** (Vanilla/TypeScript)\n- **multi-page** menu, editable in `Router.ts`\n- dark layout\n- TypeScript\n- one **Sass** file\n- *good for developers who don't yet have React skills but who want to make multi-page sites with a modern React-like framework that has npm packages, can load JSON files from the file system, and you can easily publish at Vercel, etc.*","githubUrl":"https://github.com/edwardtanguay/vite-vanilla-menu","githubUrl2":"","installMarkdown":"## install\n\n- download zip\n- copy all files to new directory, e.g. `/home/yourname/projects/site001`\n- open VSCode in that directory (`code .`)\n- `npm i`\n- `npm run dev`","demoUrl":"https://vite-vanilla-menu.vercel.app","updowngradeList":"remove menu|darkViteVanilla","learningMaterialList":"","todoList":"","externalForkList":"","hasAnimation":true,"imageUrl":"http://starters-backend.tanguay.eu/images/starters/darkViteVanillaMenu.png","isFullStack":false,"readmeText":"# Vite Vanilla Site with Menu\n\nThis is a multi-page HTML/CSS/JavaScript site created with Vite Vanilla option. It has Typescript and Sass already installed. I created a simple Router which makes it possible to add pages easily (a few changes in `Router.ts` and then add e.g. `pages/PageReports.ts` which looks similar to a React component.\n\n\n\n## features\n\n- built with **Vite** (Vanilla/TypeScript)\n- **multi-page** menu, editable in `Router.ts`\n- dark layout\n- TypeScript\n- one **Sass** file\n- *good for developers who don't yet have React skills but who want to make multi-page sites with a modern React-like framework that has npm packages, can load JSON files from the file system, and you can easily publish at Vercel, etc.*\n\n## install\n\n- download zip\n- copy all files to new directory, e.g. `/home/yourname/projects/site001`\n- open VSCode in that directory (`code .`)\n- `npm i`\n- `npm run dev`\n\n## more starters, templates and frameworks\n\nhttps://starters.tanguay.eu","updowngradeItems":[{"text":"remove menu","idCode":"darkViteVanilla"}],"learningMaterialItems":[],"todoItems":[],"externalForkItems":[]},{"id":16,"idCode":"viteVanillaTestingBackendFrontendTypeScript","title":"Vite Vanilla site with TypeScript backend and frontend in same folder with CLI and unit testing","description":"This is a multi-page HTML/CSS/JavaScript site created with Vite Vanilla option. In the project there is a backend and a frontent, both written in TypeScript, which can be started with one `npm run dev` command. There is a `share` directory which has functions in TypeScript which both front and backend use. These functions are unit tested with Vitest (basically Jest for TypeScript). There is also a CLI command which can create new example items for the website. This is a good starter project for a local app where all data is produced on the backend and delivers the data to the frontend, and where you can make CLI commands to automate any repetitive tasks. This is also an actual site that I use to create and store HTML/CSS/JavaScript examples for e.g. animations, interactive components, etc. for JavaScript-DOM sites.","featureMarkdown":"- built with **Vite** (Vanilla/TypeScript)\n- **multi-page** menu, editable in `Router.ts`\n- dark layout\n- TypeScript in both backend and frontend\n- start backend and frontend with one command: `npm run dev`\n- frontend uses **Sass**\n- testing with Vitest: `npm run test` and `npm run testcov` (coverage)\n- CLI which runs a script on the backend that creates new components: `npm run ce`","githubUrl":"https://github.com/edwardtanguay/et005-starter-example-showcase","githubUrl2":"","installMarkdown":"## install\n\n- download zip\n- copy all files to new directory, e.g. `/home/yourname/projects/site001`\n- open VSCode in that directory (`code .`)\n- `npm i`\n- `npm run dev`\n\n## testing\n\n- `npm run test` (run all unit tests)\n- `npm run testcov` (show test coverage)\n\n## CLI\n\n- `npm run ce`","demoUrl":"https://et005-starter-example-showcase.vercel.app","updowngradeList":"","learningMaterialList":"","todoList":"","externalForkList":"","hasAnimation":true,"imageUrl":"http://starters-backend.tanguay.eu/images/starters/viteVanillaTestingBackendFrontendTypeScript.png","isFullStack":false,"readmeText":"# Vite Vanilla site with TypeScript backend and frontend in same folder with CLI and unit testing\n\nThis is a multi-page HTML/CSS/JavaScript site created with Vite Vanilla option. In the project there is a backend and a frontent, both written in TypeScript, which can be started with one `npm run dev` command. There is a `share` directory which has functions in TypeScript which both front and backend use. These functions are unit tested with Vitest (basically Jest for TypeScript). There is also a CLI command which can create new example items for the website. This is a good starter project for a local app where all data is produced on the backend and delivers the data to the frontend, and where you can make CLI commands to automate any repetitive tasks. This is also an actual site that I use to create and store HTML/CSS/JavaScript examples for e.g. animations, interactive components, etc. for JavaScript-DOM sites.\n\n\n\n## features\n\n- built with **Vite** (Vanilla/TypeScript)\n- **multi-page** menu, editable in `Router.ts`\n- dark layout\n- TypeScript in both backend and frontend\n- start backend and frontend with one command: `npm run dev`\n- frontend uses **Sass**\n- testing with Vitest: `npm run test` and `npm run testcov` (coverage)\n- CLI which runs a script on the backend that creates new components: `npm run ce`\n\n## install\n\n- download zip\n- copy all files to new directory, e.g. `/home/yourname/projects/site001`\n- open VSCode in that directory (`code .`)\n- `npm i`\n- `npm run dev`\n\n## testing\n\n- `npm run test` (run all unit tests)\n- `npm run testcov` (show test coverage)\n\n## CLI\n\n- `npm run ce`\n\n## more starters, templates and frameworks\n\nhttps://starters.tanguay.eu","updowngradeItems":[],"learningMaterialItems":[],"todoItems":[],"externalForkItems":[]}]